There are two ways to configure rules in IIS to further restrict access to the VSA.
Option 1 - Automated Script
Download the zip file from here with the script and instructions.
Option 2 - Manual Configuration
1. Download URL Rewrite Tool from Microsoft
Visit this site and follow the link to download the IIS addon.

2. Install URL Rewrite
Once downloaded, run the downloaded file (urlrewrite2.exe) on your Kaseya VSA server web front end (the IIS server).
3. Load Computer Management on the VSA Server
Click Start and search for Computer Management.
4. Access the URL Rewrite add-on
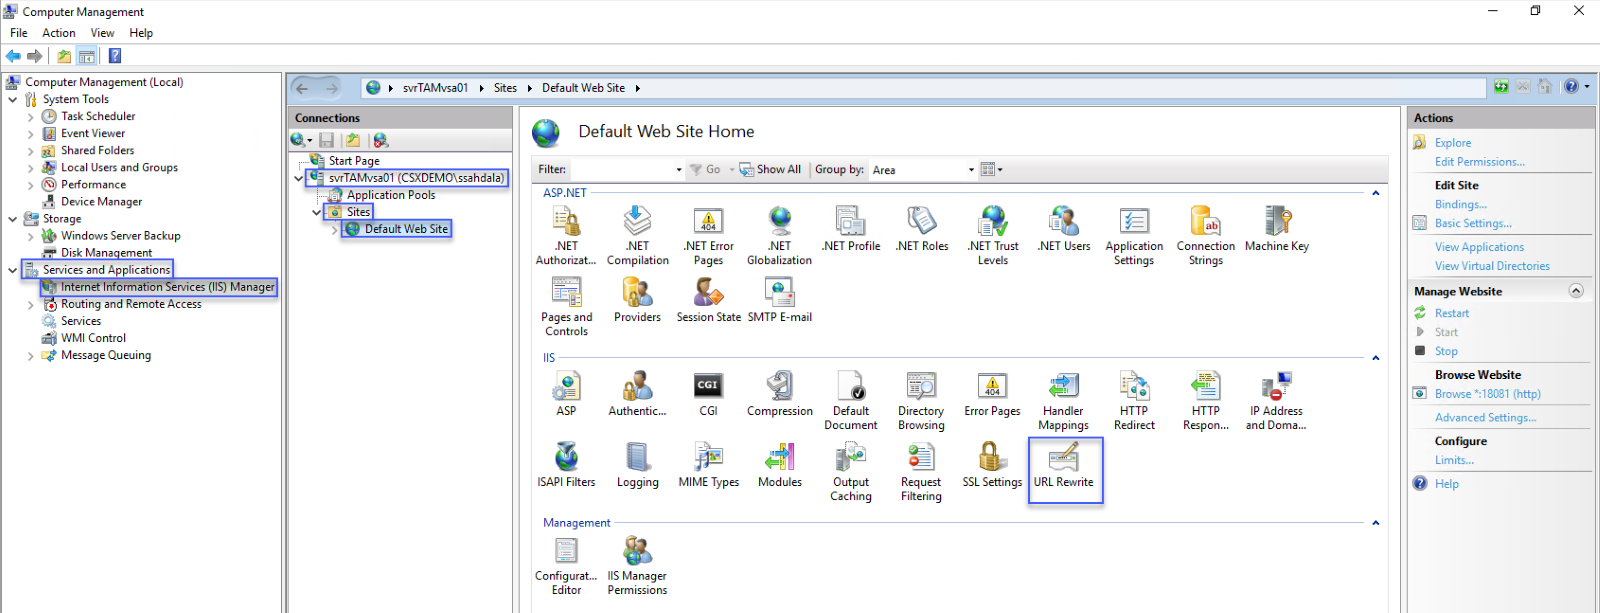
- In Computer Management, expand Services and Applications.
- Select Internet Information Services (IIS) Manager.
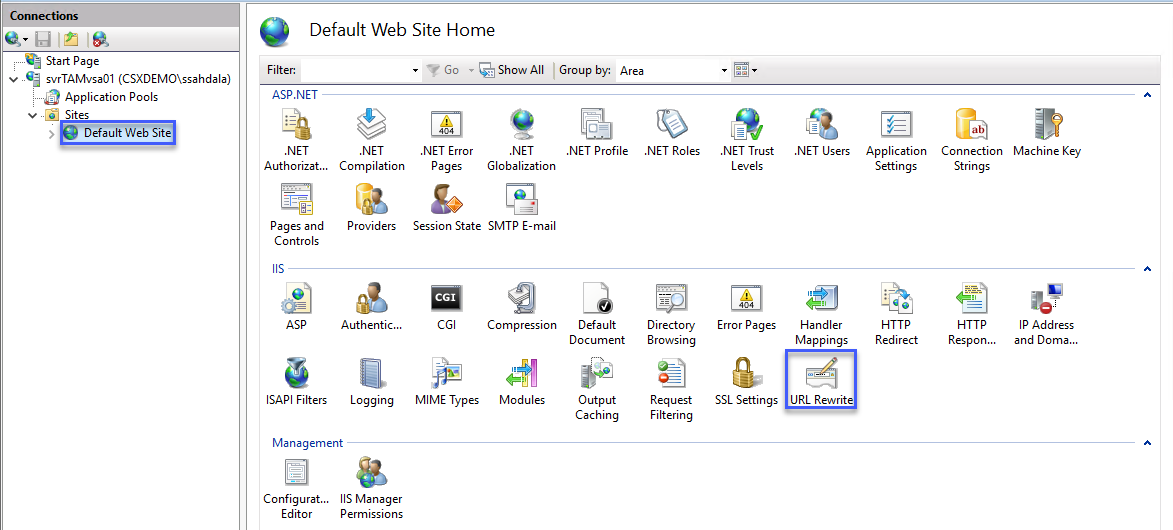
- In the Connections pane, Expand <Computer Name>
- Expand Sites
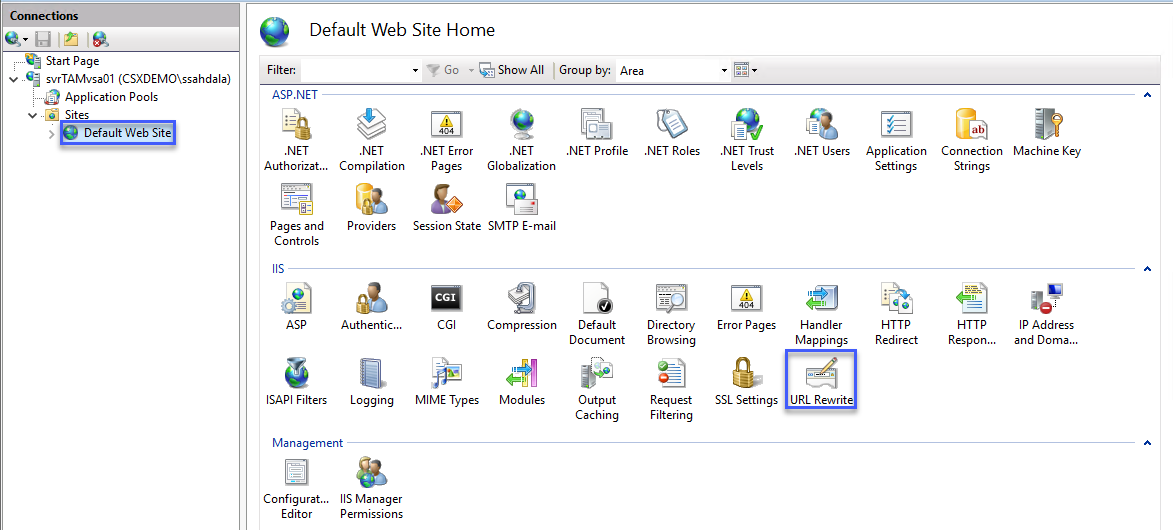
- Click on Default Web Site
- Double-click the URL Rewrite icon
5. Add a new Request Blocking rule
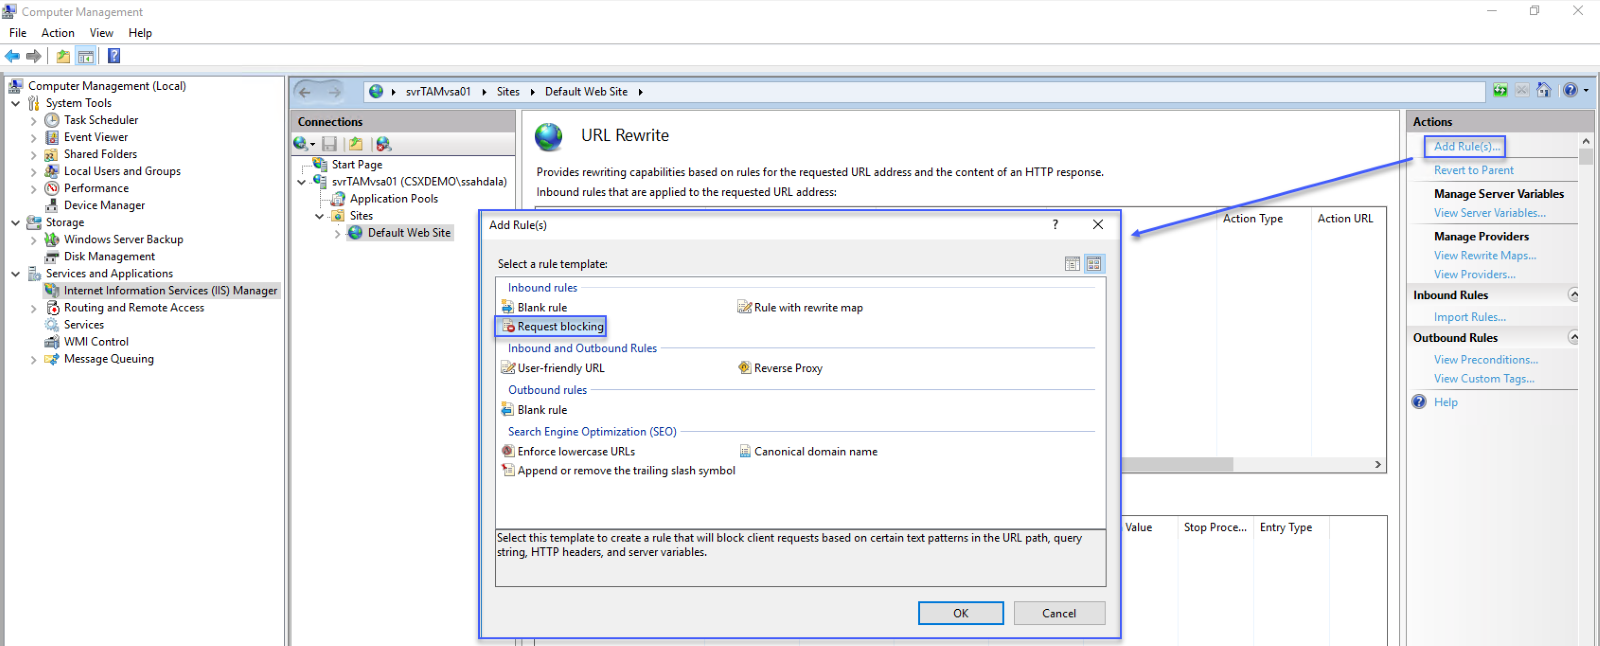
- Click the Add Rule(s)... link
- Double-click on Request blocking
- Enter * in the Pattern (URL Path) field
- Change the How to block to Abort Request
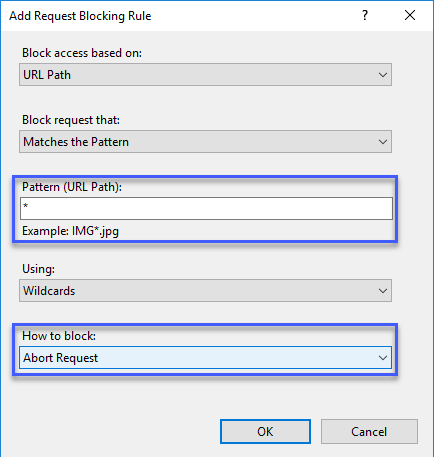
- Click OK
Select the new rule created and double-click on it to edit it.
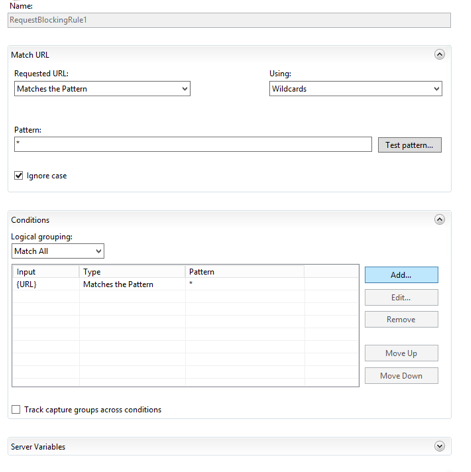
Click on ADD - To define the next rule as below:
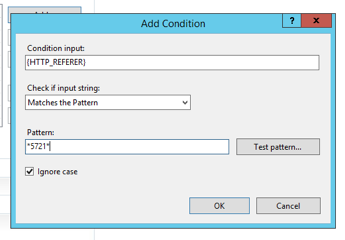
Once, complete the first set of rules will look like this:

When complete press the Apply link in the Actions menu on the top right.

Click on Default Web Site then double click on URL Rewrite again.
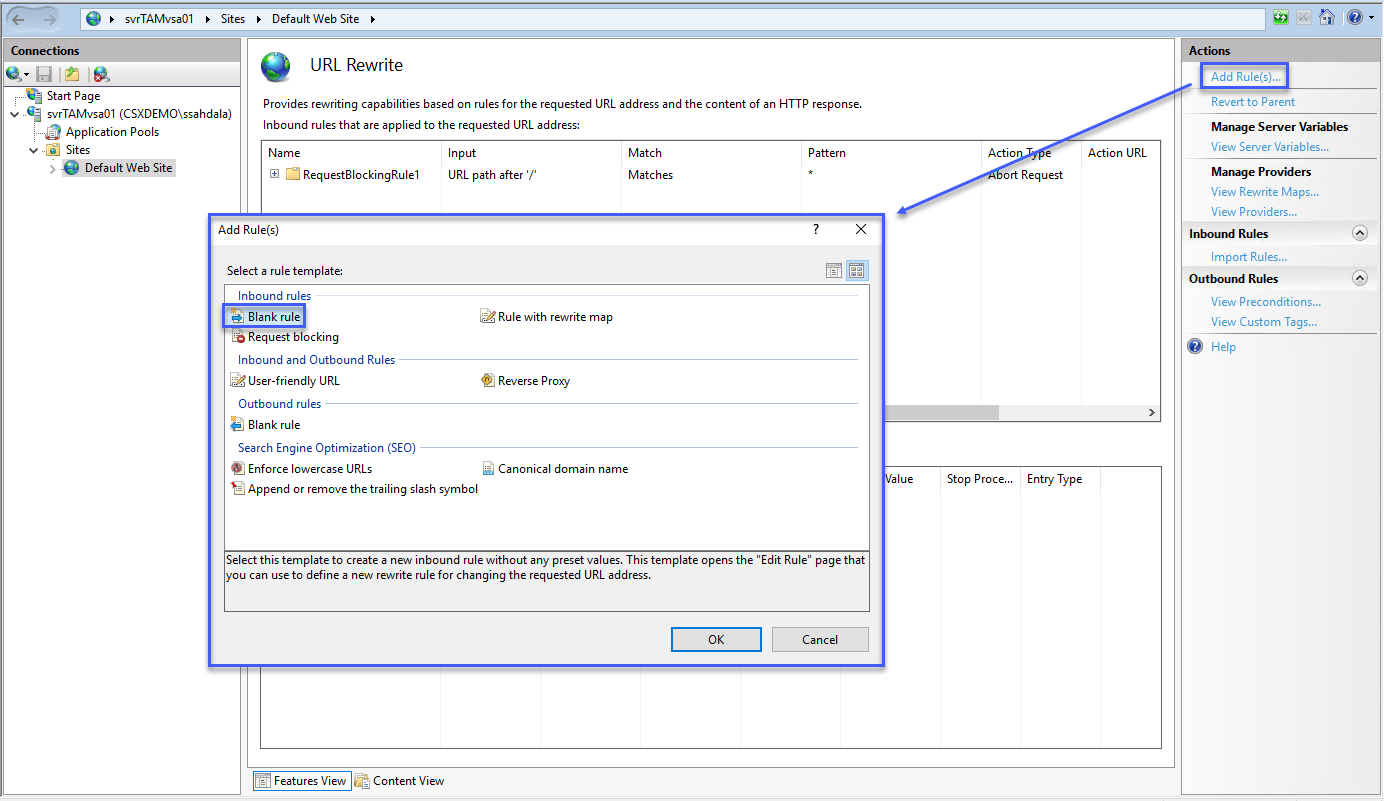
Add a rule to allow API calls
- Click the Add Rule… link in the Actions menu on the right-hand side.
- Select Blank Rule and click OK
- In the Name field, enter Allow API Access
- Select Wildcards from the Using dropdown
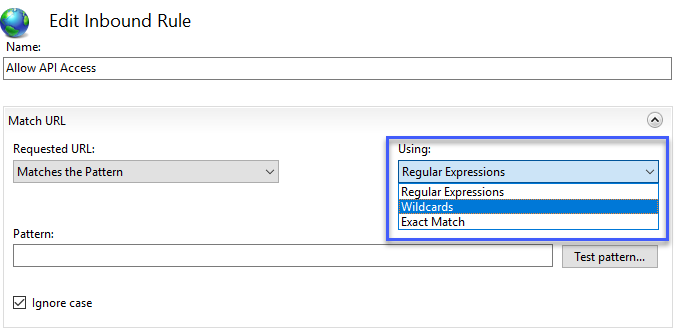
- Enter * in the Pattern field
- Expand the Conditions section

- Click Add to add a new condition
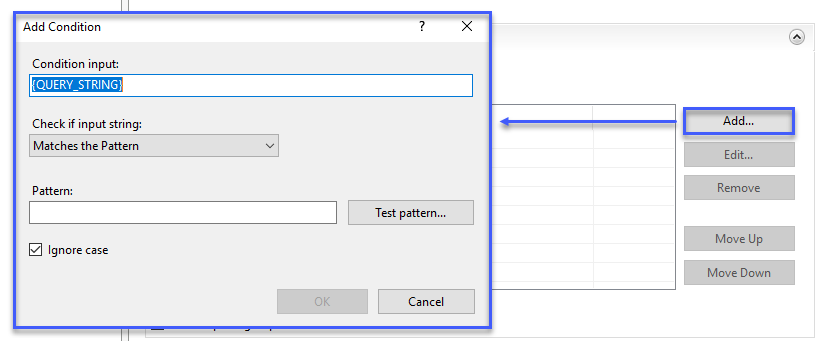
- In the Add Condition dialog enter the following in the appropriate fields.
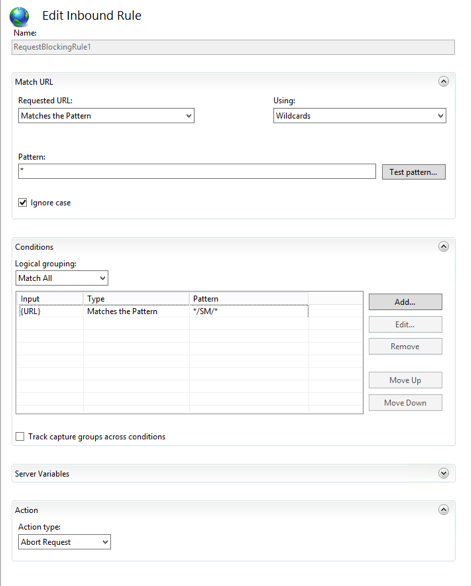
- Condition input = {URL}
- Pattern = */api/*
Your condition should look like this:
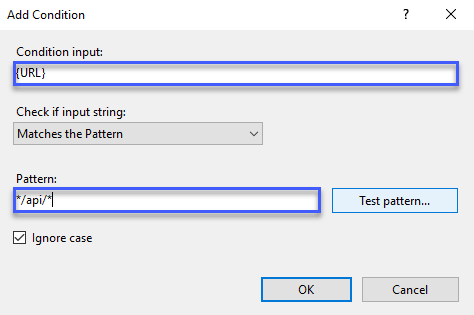
- Click OK
- In the Edit Inbound Rule window, scroll down to find the Action options
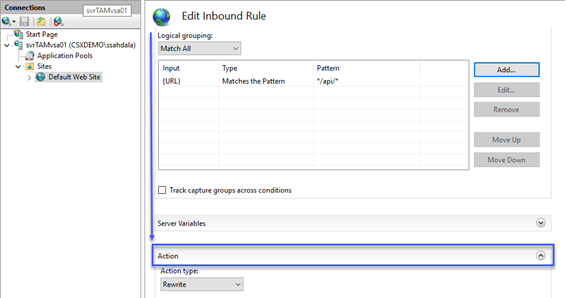
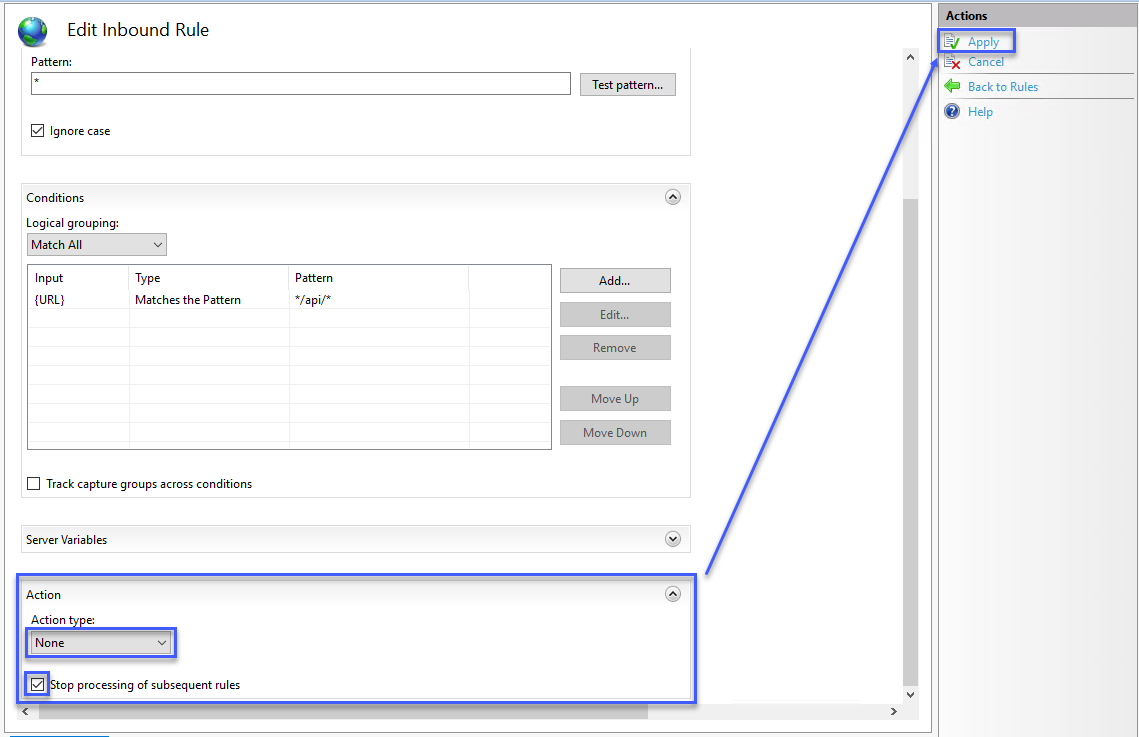
- Select None for the Action (we want to allow these requests)
- Check the Stop processing of subsequent rules checkbox
- Click Apply
Click on Default Web Site then double-click on URL Rewrite again.
Check that the Allow API Access rule is first on the list
Now we need to create the rule for Software Management. Follow the same steps as above to create the API rule, except the pattern will not be */api/* but */SM/*
6. Then make sure to reorder as below:

NOTE: You MUST select the API and SM rules and use the Move Up link to move the rule to the top of the list to match the picture above. The block rule must be the last one.
7. Test the configuration
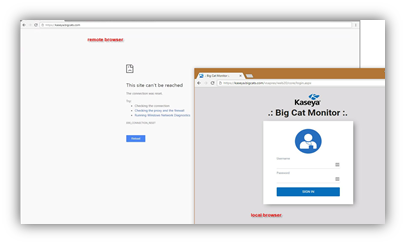
You should now find that accessing HTTPS://<your.server.address> from your allowed IP addresses works as before. When trying to reach the web interface from any other address, it will result in a browser error message.
For a list of integrations to whitelist please see this article.
https://helpdesk.kaseya.com/hc/en-gb/articles/4403869952657