Organizations who can’t install a SSL Certificate issued by a Trusted Certificate Authority will typically use a self-signed SSL Certificate. This is common for test systems or where systems are only internally addressable and do not have a public domain name which a Trusted Certificate Authority can verify.
Self-signed SSL Certificates provide the same encryption of certificates issues by a Trusted Certificate Authority. The drawback is that since these certificates are not signed by a Trusted Certificate Authority, most web browsers will issue a certificate warning since they don’t “trust” the organization that issued the certificate.
Users can click through the browser warning or, in many cases, permanently store the exception so they don’t see the warning on future visits, but the impact of the browser warnings typically concern end-users. Thus, using self-signed SSL Certificates are not recommended for production systems.
If you wish to use a self-signed SSL Certificate to encrypt web-based communication with the Kaseya Application Firewall, review the following steps to create a self-signed SSL Certificate
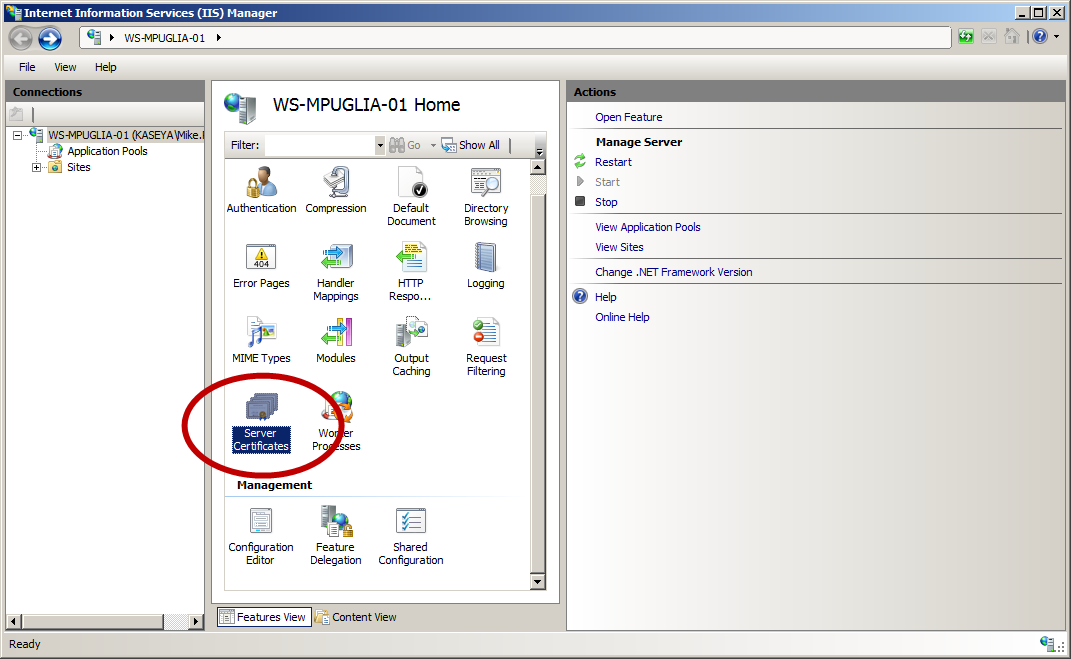
1. Open MS-IIS Manager and click the icon for “Server Certificates”

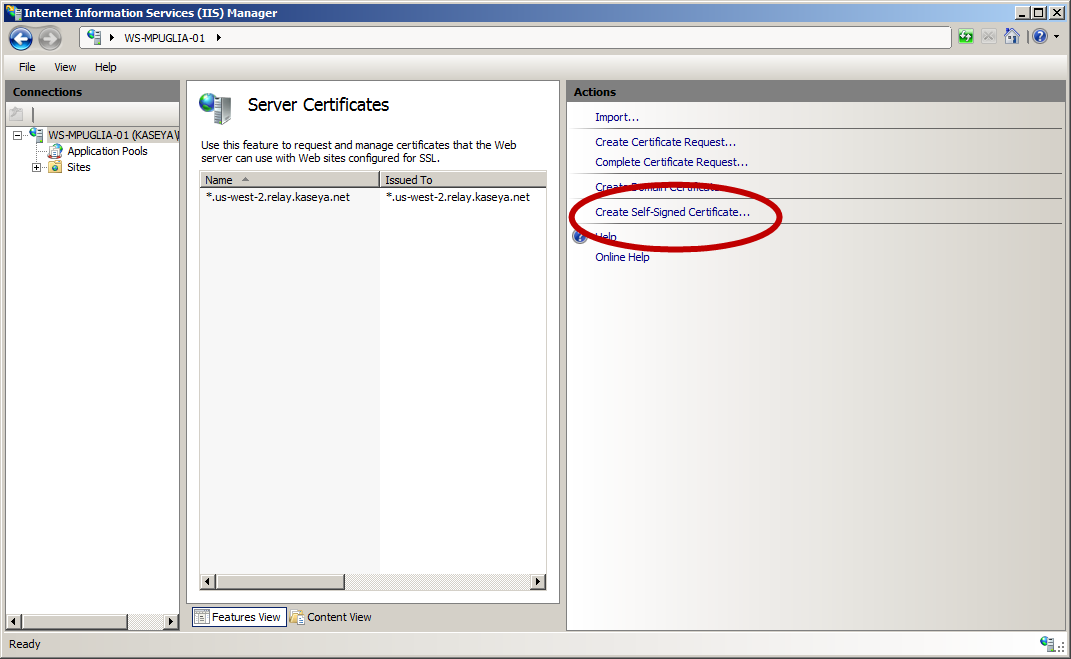
2. Click the link on the right labeled “Create a Self-Signed Certificate”

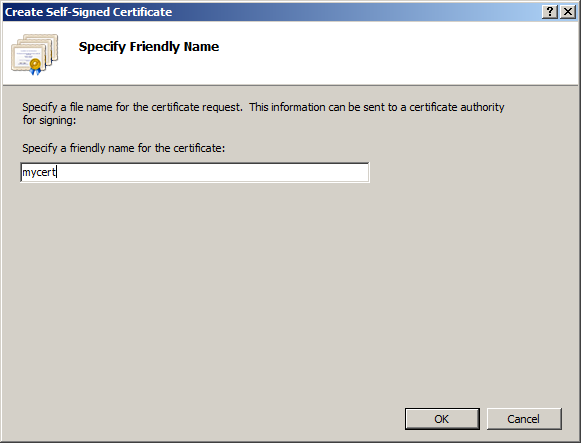
3. Enter a friendly name for the certificate so you can identify it

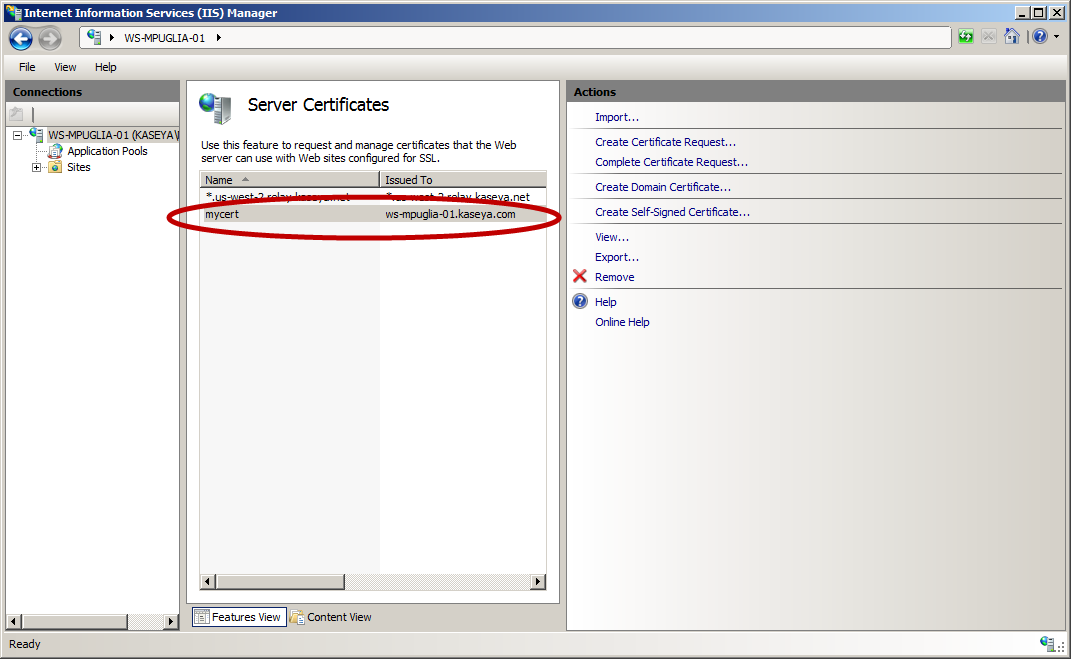
4. MS-IIS will automatically create the certificate for you as shown below

4. To export your new self-signed SSL Certificate out of MS-IIS and use it with the Kaseya Application Firewall, follow the instructions at: https://helpdesk.kaseya.com/hc/en-gb/articles/229026408-Using-An-Existing-SSL-Certificate-R7-through-R9-3