Please note that this article only applies to version R7, R8, R9, R9.1, R9.2 and R9.3
Note: If you've upgraded to 9.4, please refer to this article: Using An Existing SSL Certificate - R9.4 And Up.
Kaseya uses an SSL certificate to provide administrators and client computers with a secure (HTTPS) connection to the management server. To use an existing SSL certificate (such as one purchased for use with your Kaseya server), this must first be copied in PFX format to a permanent location, such as X:\Kaseya\Certificate (where X: is the drive containing the Kaseya software installation). Kaseya must then be told where to find this certificate file.
PLEASE NOTE: the exported PFX file MUST REMAIN IN THIS LOCATION, as the Kaseya Edge Services service reads the certificate from this location each time it starts. If the certificate is moved or deleted or can no longer be read, Kaseya Edge Services will no longer start.
The following steps explain how to generate the PFX file required by Kaseya, and how to point Kaseya to this file. The steps assume that the certificate is already installed on the computer and ready to be exported, such as if the certificate was requested and installed using Microsoft IIS.
First, the certificate must be exported to a PFX file, with all the intermediate certificates included. This can be done from within Microsoft Management Console (MMC) as follows.
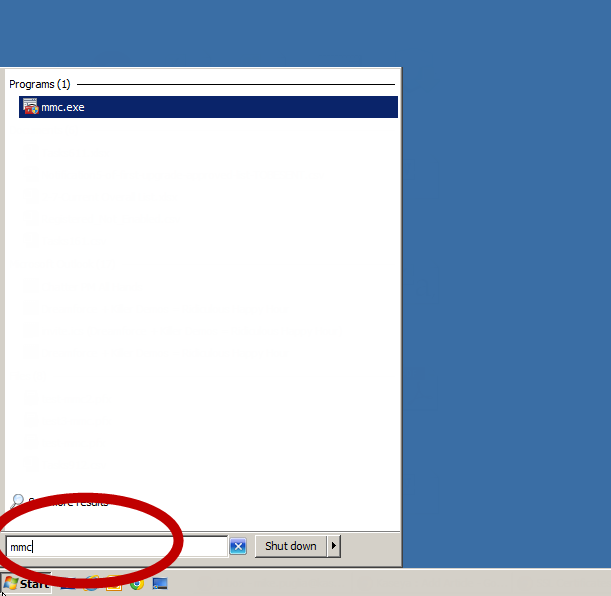
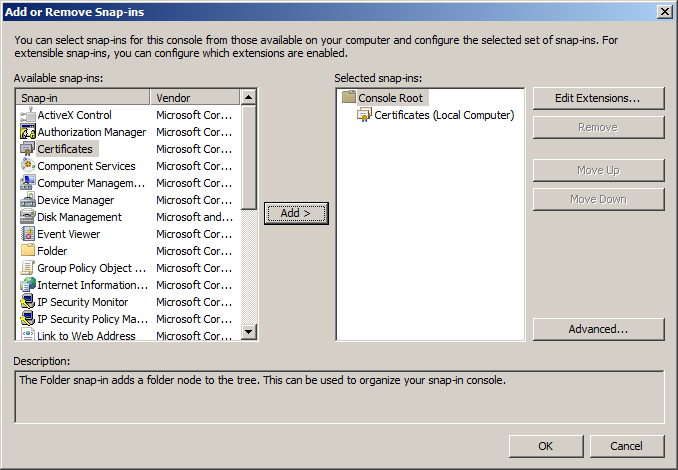
1. Start MMC by going to Start → mmc.exe
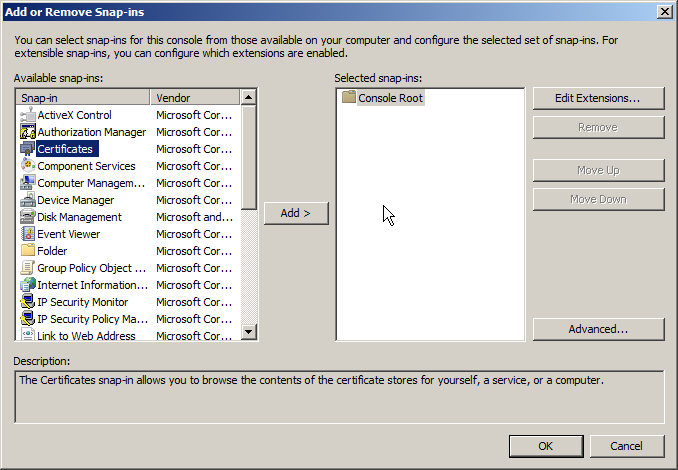
2. From MMC, choose File → Add/Remove Snap-in

3. From Add or Remove Snap-ins, select "Certificates" then click "Add"
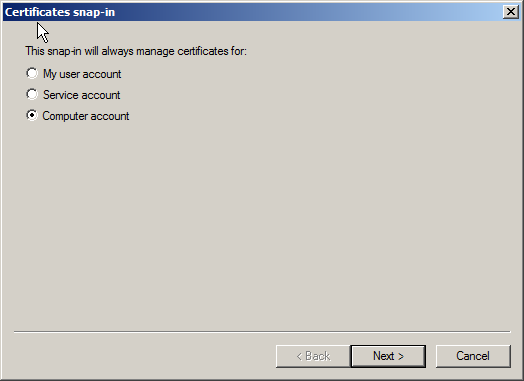
4. Select "Computer Account"
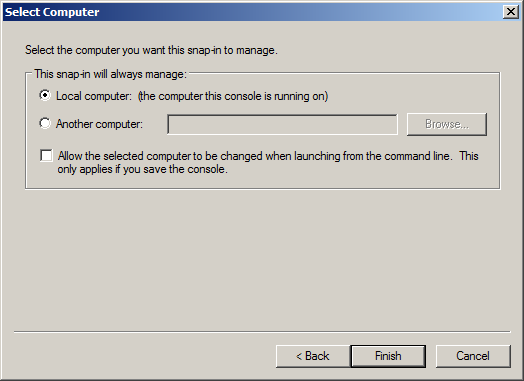
5. Select "Local Computer"
6. You now see "Certificates (Local Computer) in the selected snap-ins, click "OK"
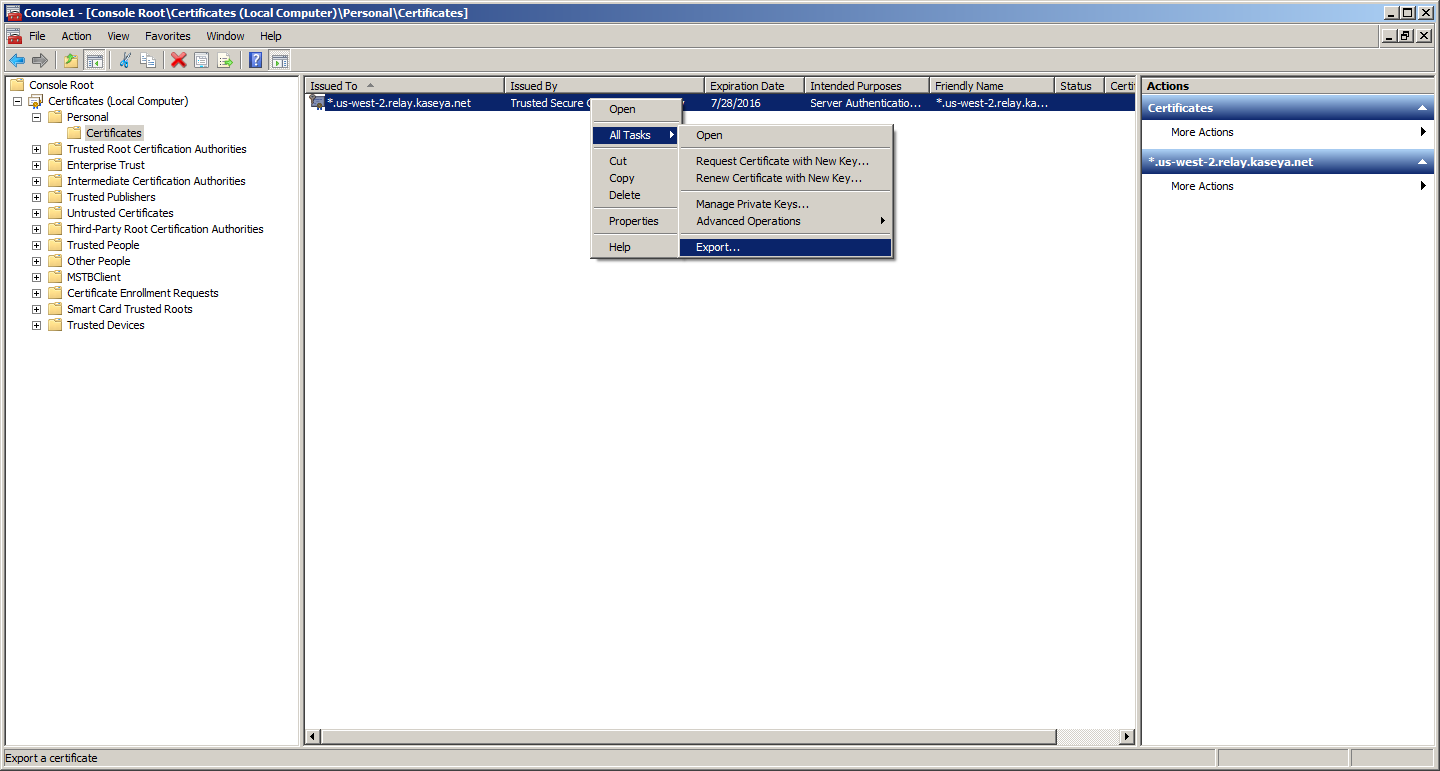
7. Select Your Certificate
In the left-hand pane, open Certificates → Personal → Certificates and it will show you all the SSL certificates that you have installed. Select the one you wish to export, then right click and select "All Tasks" and then "Export"
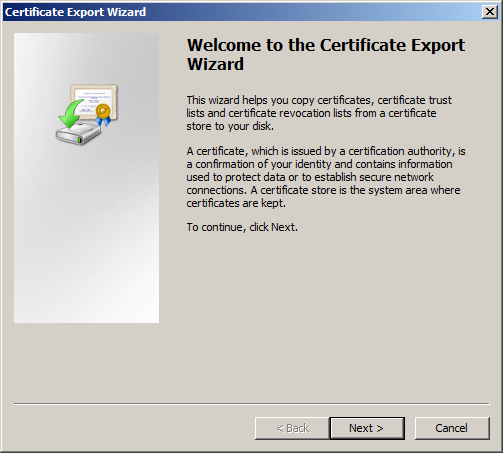
8. The Certificate Export Wizard will open; click "Next" to proceed
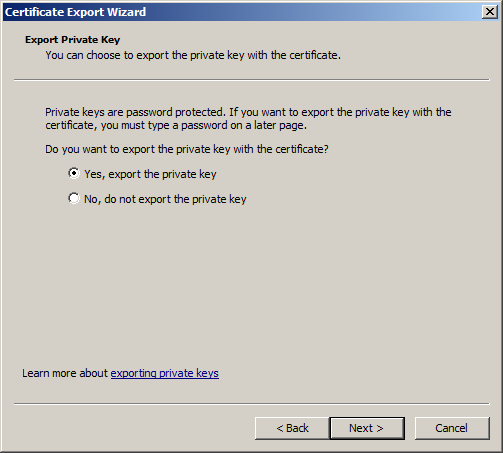
9. You must select "Yes, export the private key", then click "Next"
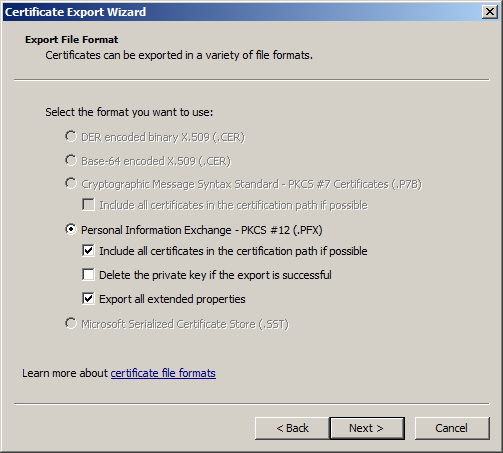
10. You must select "PKCS#12 and check "Include all certificates in the certification path if possible" and "Export all extended properties", then click "Next"
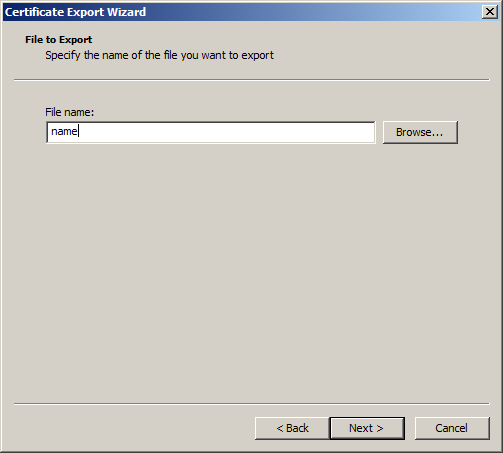
11. Choose the name and location for the PFX file.
Be sure to select a permanent location for the certificate, as Kaseya will read the certificate from this location going forwards.
Do not save the certificate into any location where Kaseya may not be able to access the file, such as a user's personal directory (e.g. C:\Users\Sam\Desktop\myCert.pfx) or a network share (either a mapped drive, or a UNC path such as \\FILESERVER\Data\myCert.pfx). Mapped drives are user-specific and both network shares and personal directories may not be readable to Kaseya Edge Services, either now or in the future.
The PFX file must be available at all times to the Kaseya Edge Services.
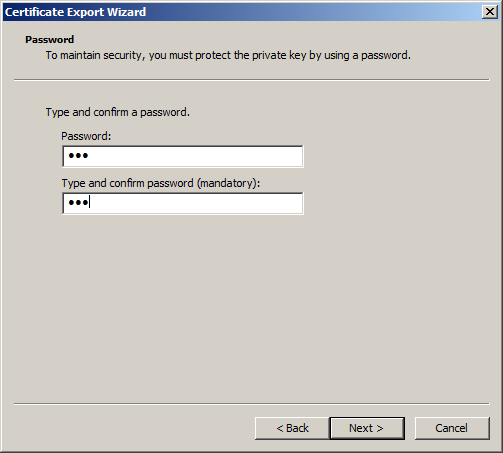
12. Give the file a password
Please note that the password is stored in plain text in the Registry, so use a password that is specific to this file.
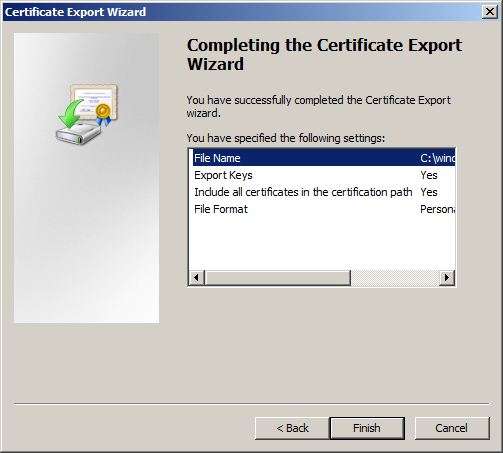
13. Complete the export
Now you must inform the Kaseya software of the location of the PFX file.
This can be done either during installation (you will receive a prompt) or afterwards, such as for certificate renewal.
14. Below is a screenshot of the prompt that is shown during installation:
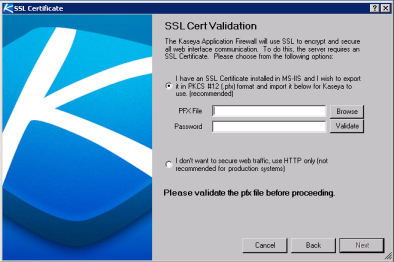
To provide a new certificate when the product is already installed, go to Start → Programs → Kaseya → SSL Configuration Tool.
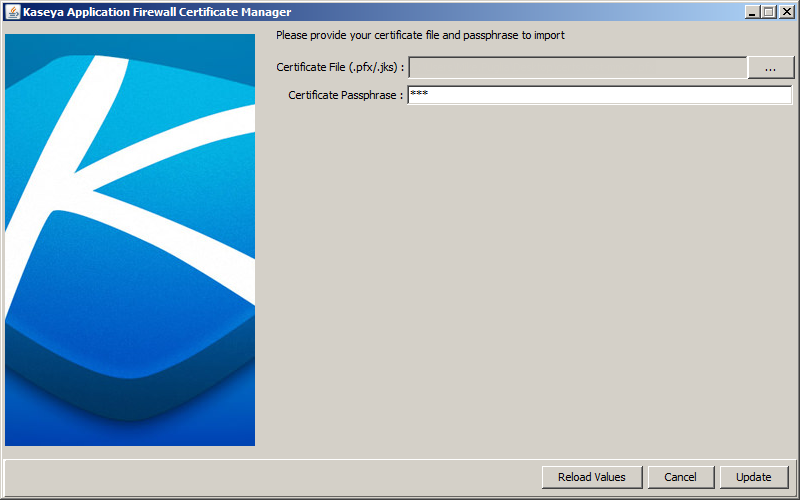
15. In each case, browse to the certificate file and select it. Enter the password for the certificate file.
Although the SSL Configuration Tool uses the term "Import", the certificate file will be read from its existing location each time the Kaseya Edge Services is started. Do not delete the PFX file afterwards.
NOTE: If you receive the error "Failed to update certificate details in registry" error on step 15, this is caused by SSL Configuration Tool not having permission to write to the Registry.
NOTE: If you receive the error "Failed to update certificate details in registry" error on step 15 :
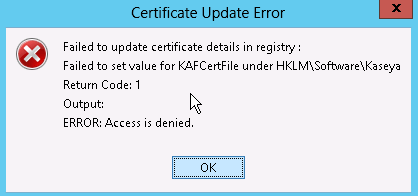
To resolve this, run SSL Configuration Tool elevated as follows:
Right click on Command Prompt and choose Run as administrator
Change directory to C:\Kaseya\Services\KaseyaApplicationFirewall\
Type: java -jar kaftool.jar --importui
This will launch the SSL Configuration Tool as an administrator, allowing it to write to the Registry. You can now continue to complete Step 15
Finally, restart Kaseya Edge Services:
NOTE: If you do not see the error above but your SSL Cert is not updating then please check the following
Open Registry Editor by running regedit.exe
Check the registry for Kaseya at HKEY_LOCAL_MACHINE\SOFTWARE\Kaseya
Remove the registry Keys referencing KAFUseSSL if they exist if they don't exist please proceed with step 15 to re-enter the certificate information.
17. Go to Services and restart the "Kaseya.ApplicationFirewall" service (if you are running Version 7) or "Kaseya Edge Services" service (if you are running R8 and later). The software will now use the SSL Certificate you imported.