NOTE: THE FOLLOWING PROCEDURES NEED TO BE MODIFIED IF YOU DO NOT USE 'KaseyaUninstall' AS YOUR UNINSTALL PASSWORD (Modify the getVariable(kavPassword) step):
Manual KAV Functions/Uninstall/KAV10/Uninstall KAV10
Manual KAV Functions/Uninstall/KAV6/Workstation/Uninstall KAV6
Manual KAV Functions/Uninstall/KAV6/Server/Uninstall KAV6
Manual KAV Functions/Ininstall/Install KAV10 SRV
Manual KAV Functions/Ininstall/Install KAV10 WKS
Manual KAV Functions/Ininstall/Check If Successfully Installed
Step 0 - If doing manual installs as well, follow these steps first, otherwise go straight to step 1.
copy and paste the following 5 files located in
<<kaseya install directory>>\WebPages\ManagedFiles\VSAHiddenFiles\kav\installers\10.2.1.23 directory>>\WebPages\ManagedFiles\VSAHiddenFiles\kav\installers\10.2.5.3201
to <<kaseya install directory>>\WebPages\ManagedFiles\VSASharedFiles
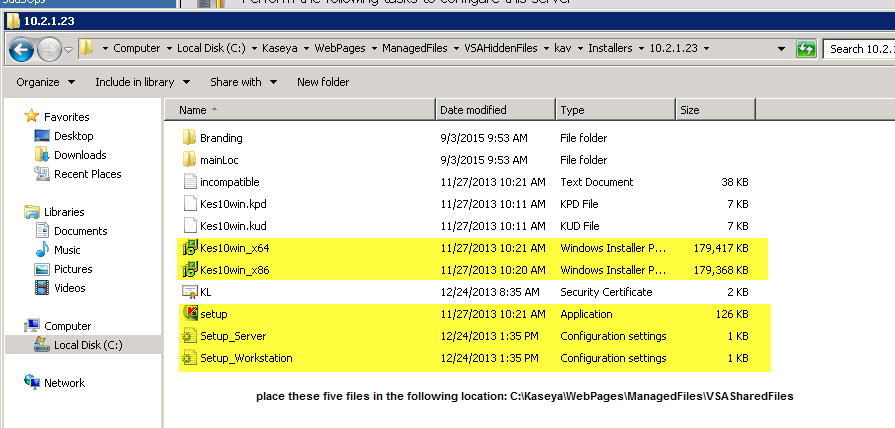

Additionally, if manually applying keys, please also copy and place the 10xUpdate.key file located in C:\Kaseya\WebPages\ManagedFiles\VSAHiddenFiles\KAV\10xUpdate.key in the same VSASharedFiles directory.
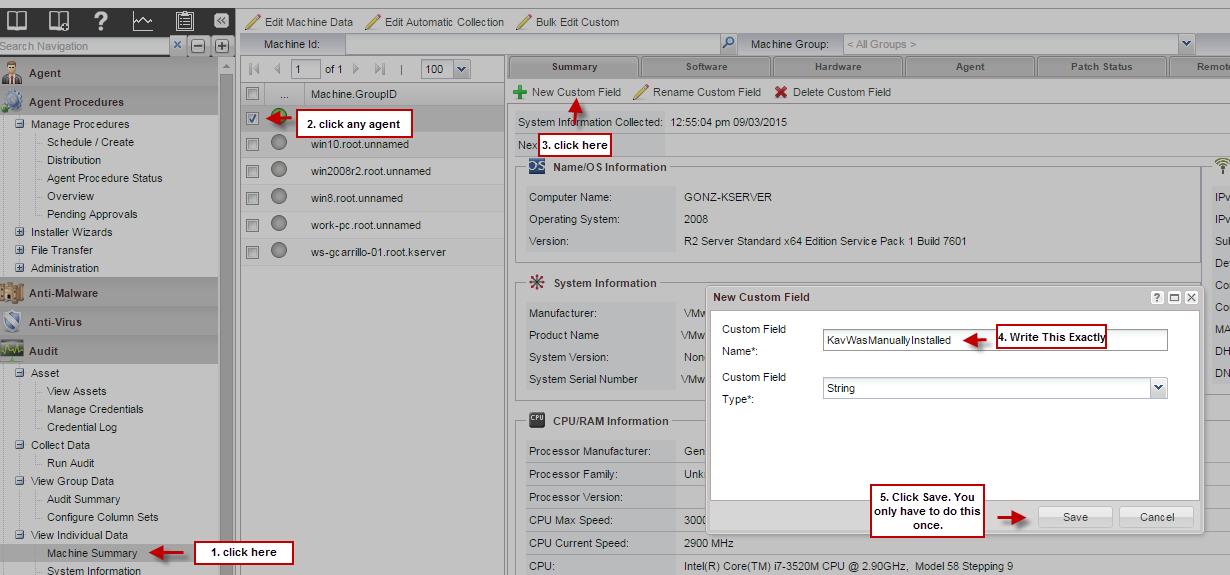
Step 0.2 - Create a custom field called "KavWasManuallyInstalled":
Step 0.3 - Create the following view:
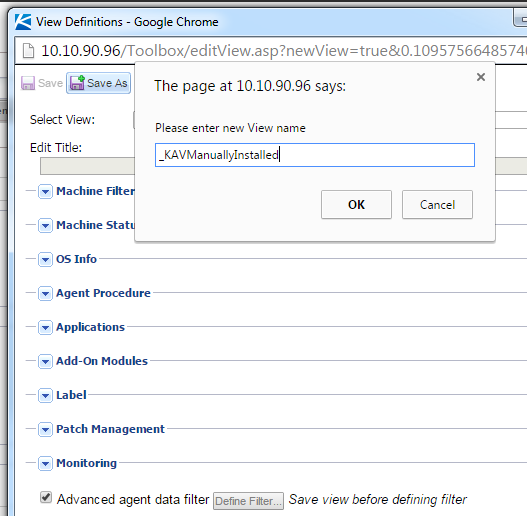
Click "Define Filter" button after saving the view and scroll down to the KavWasManuallyInstalled Field and change the * to Yes

Finally, click apply at the top of this popup and save the view one more time. The VSA will refresh.

-- START HERE IF NOT DOING INSTALLS --
Step 1 - Upload the kav6 installers from the following link and add them to the following directory:
<<kaseya install directory>>\WebPages\ManagedFiles\VSASharedFiles
Step 2 - Download and unzip attached zip file.
Step 3 - Upload the attached file to the following directory on the kaseya server:
delete_kav_from_vsa.xml -> C:\Kaseya\xml\Procedures\AgentProcSQL\0\SQLWrite\
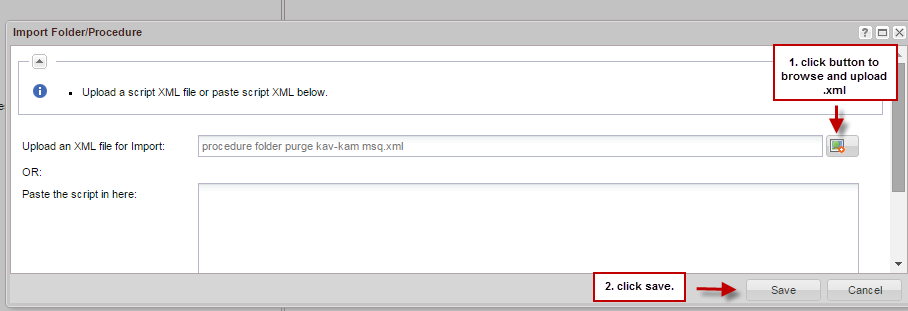
Step 4 - Navigate to Agent Procedure > Manage Procedures > Schedule/Create. Select the folder you wish to import the attached procedure xml Procedure Folder Manual KAV Functions.xml) to and then click the "Import Folder/Procedure" Button:

Step 5 - Navigate to and open the KAV MANUAL FUNCTIONS folder and confirm all files as per the screenshot below are present:
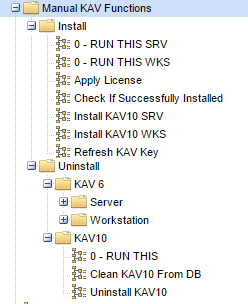
Step 6 - Select the "0- RUN THIS" procedure depending on what you are looking to do as the procedures are categorized by functionality, select the agent and run/schedule the procedure:

ABOUT MANUAL INSTALLS:
If you manually installed kav with the process above, please make sure you complete the steps by doing a connect install:

We do not recommend following this process unless you are experiencing issues with the module.
Final Note: If this procedure fails or does not do what it's supposed to, that is likely a problem on the endpoint because this has been tested in our environments without issue. PLEASE be aware, "Kaseya support does not actively do custom scripts".This was created in hopes of automating a task and support will not be able to modify it in any way. THIS IS A SCRIPT AS-IS.