QUESTION:
How do I add a VCenter / VMWare device in Traverse?
SOLUTION:
Please follow the steps below to add a hyperV/VMware/Esx server device type from traverse GUI
Step 1 : Setting Up Shared Credentials
Setup your "Shared Credentials" by navigating to "Administration >> Others"
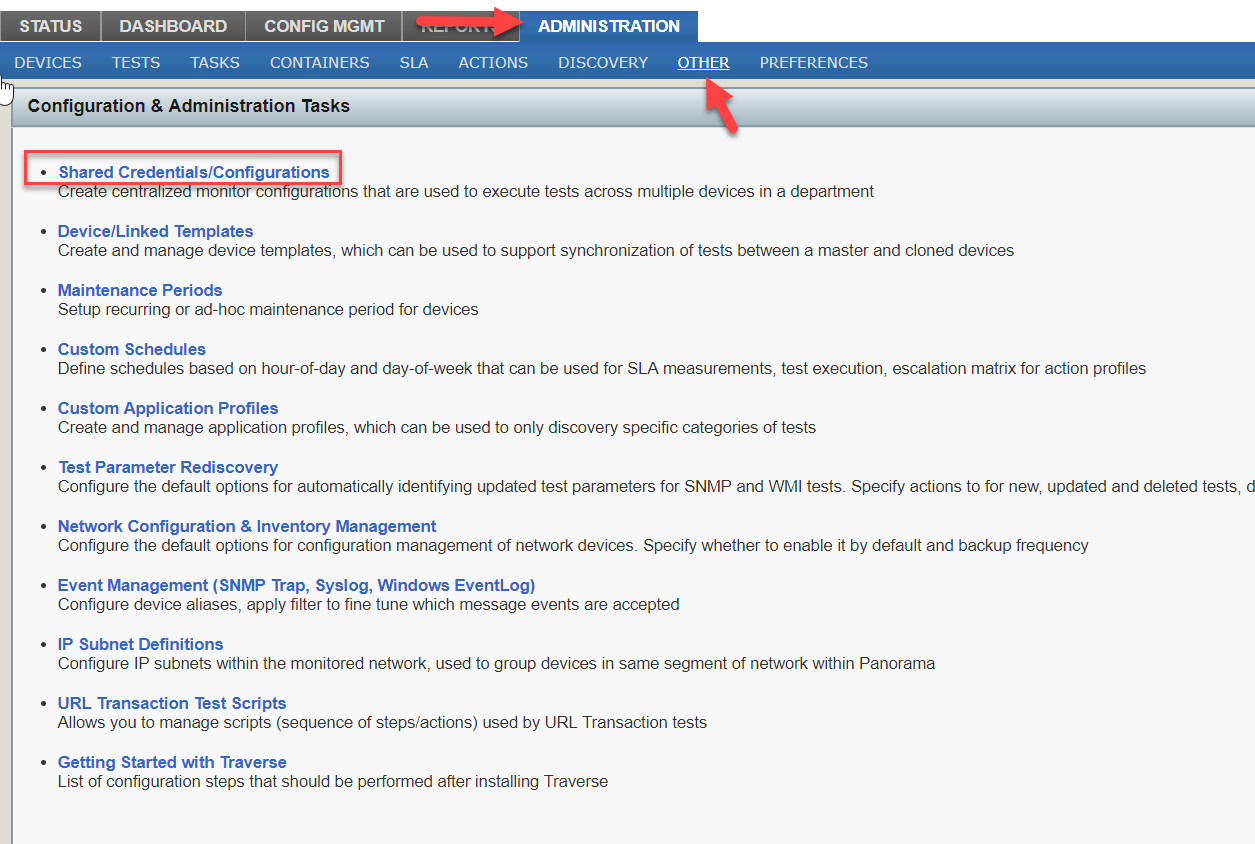
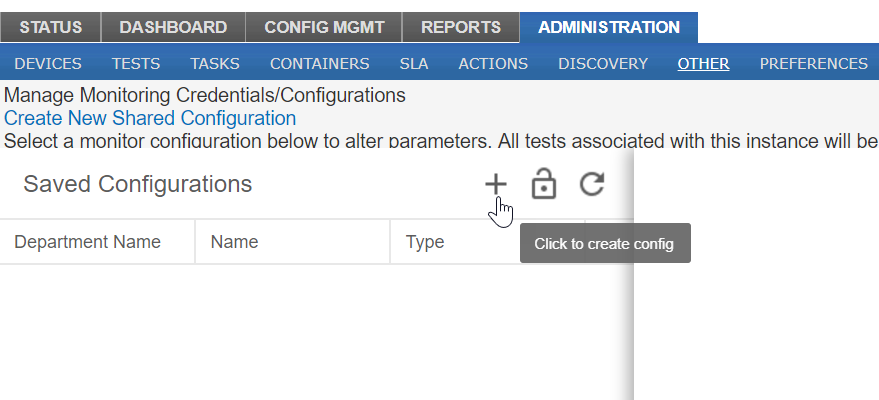
Click on the "+" sign to create new shared credential
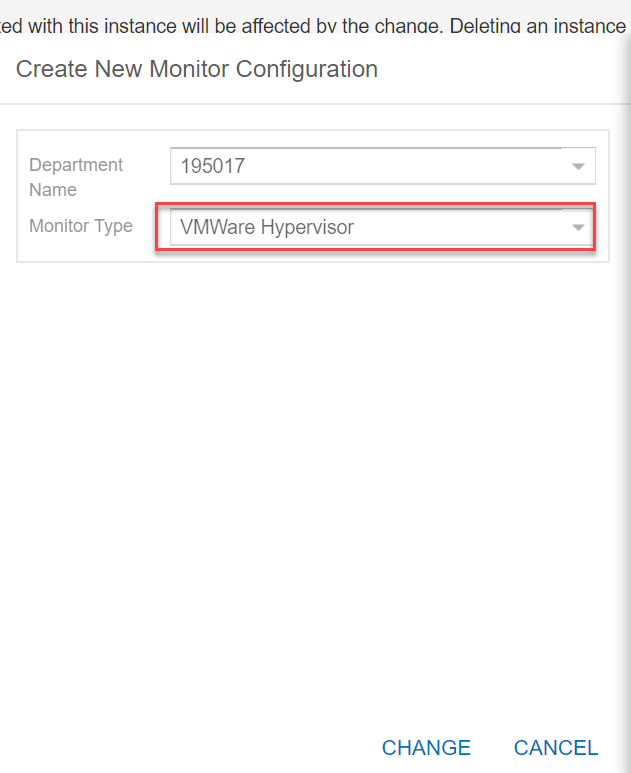
Select the Department on which you intend to create this shared credential and select the "Monitor type" as "VMWare Hypervisor".
Give a Name of your choice for the credentials, Enter the correct IP address and Admin login credentials for the vCenter and click on "Save" button. [Refer the example shown below]
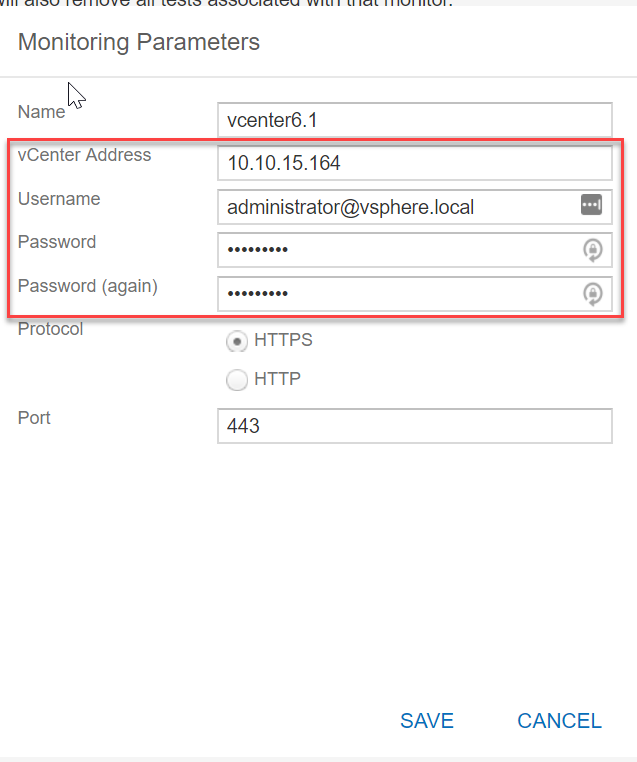
Step 2 : Adding the vCenter/vmware Device
Navigate to "Administration >> Devices" and Click on the Red '+' button at the bottom
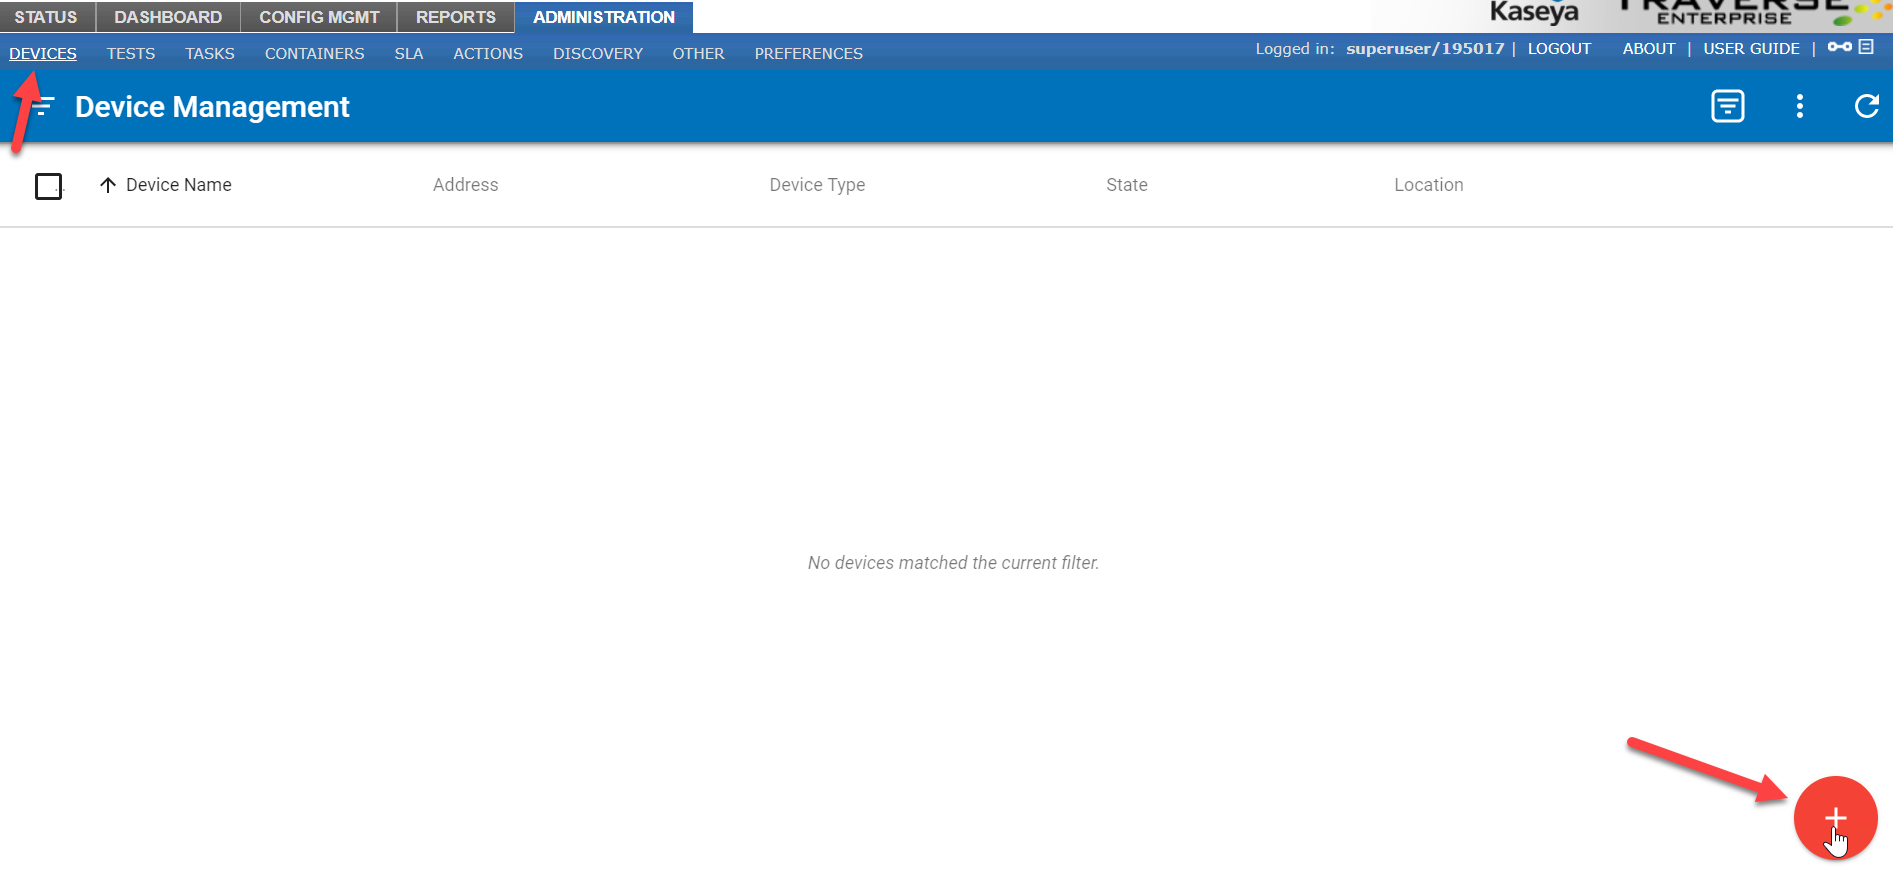
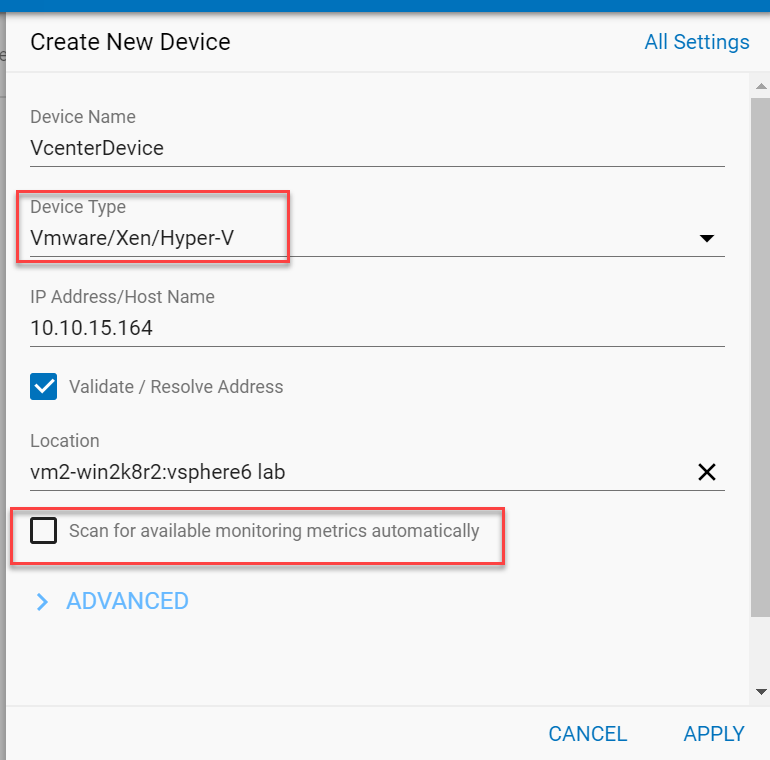
On the new device creation box, fill :
- Name of the device of your choice,
- Device Type as "vmware/Xen/hyper-V"
- IP address of the device, (Please be sure that the IP Address/Hostname matches the entry in the VCenter Shared Credential)
- Location of your device
Finally make sure you uncheck the "Scan for available monitoring metrics automatically" and click on "Apply".
Refer screenshot below for your guidance
Step 3 : Configuring the vmware tests
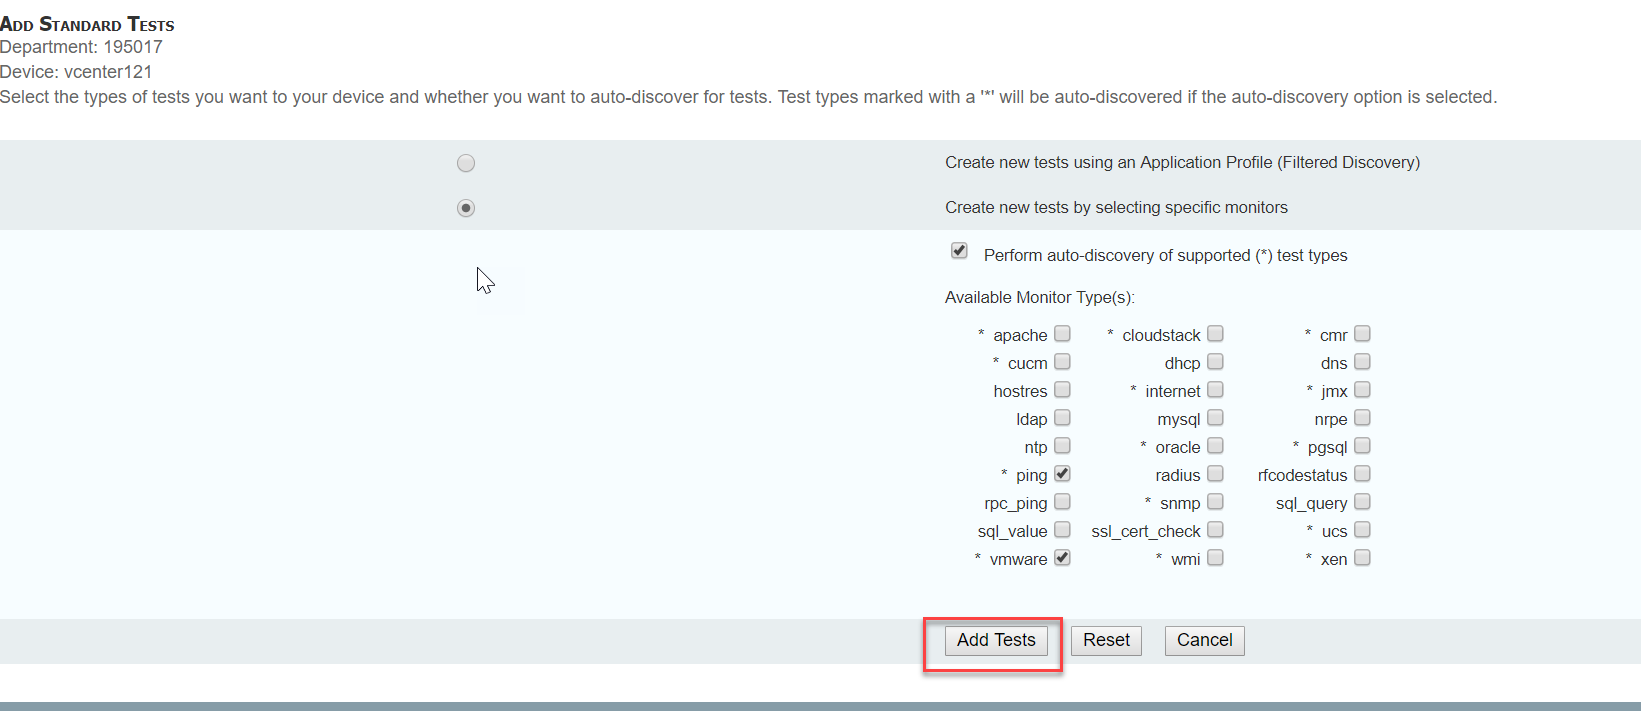
Finishing the previous step takes you to the new page to manually select the tests as directed below.
On "Add Standard Tests" page select "vmWare" test and click on "Add Tests" button
On the "Filter Tests To Create" page make no changes and click on "Continue" button
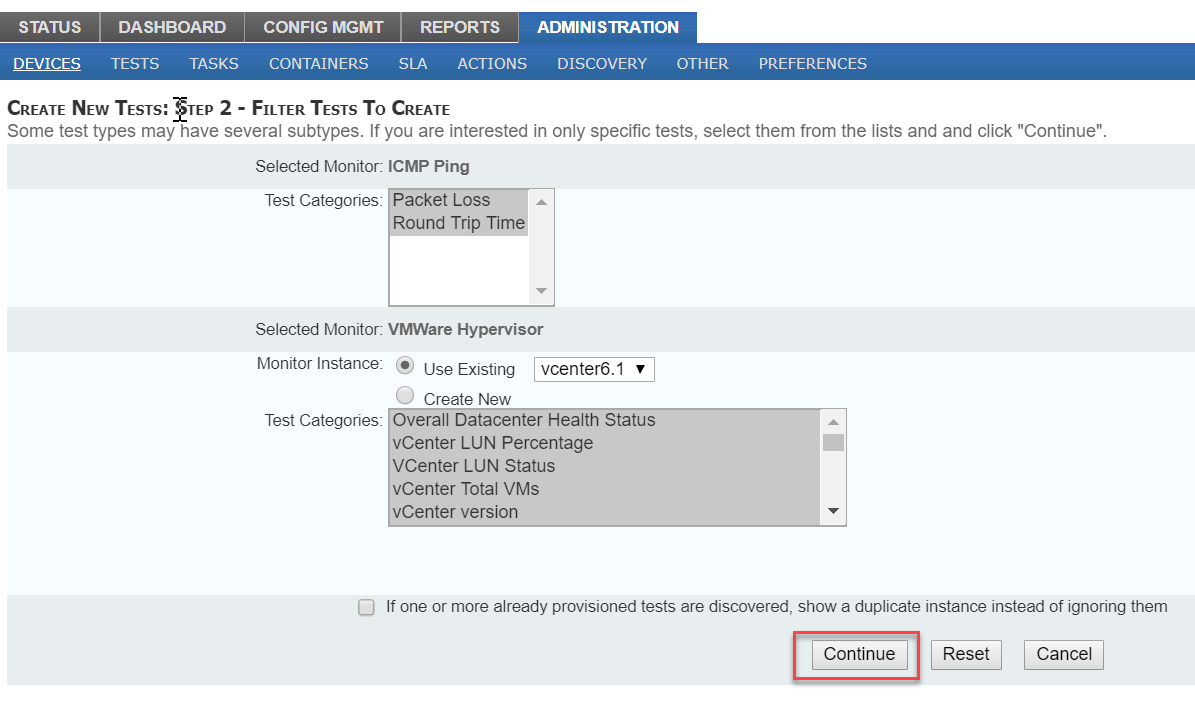
Step 4 : Provisioning the Tests
From the "Configure Test Parameter Page" select the tests you would like to provision. Once completed please click on the button "Provision Selected tests"
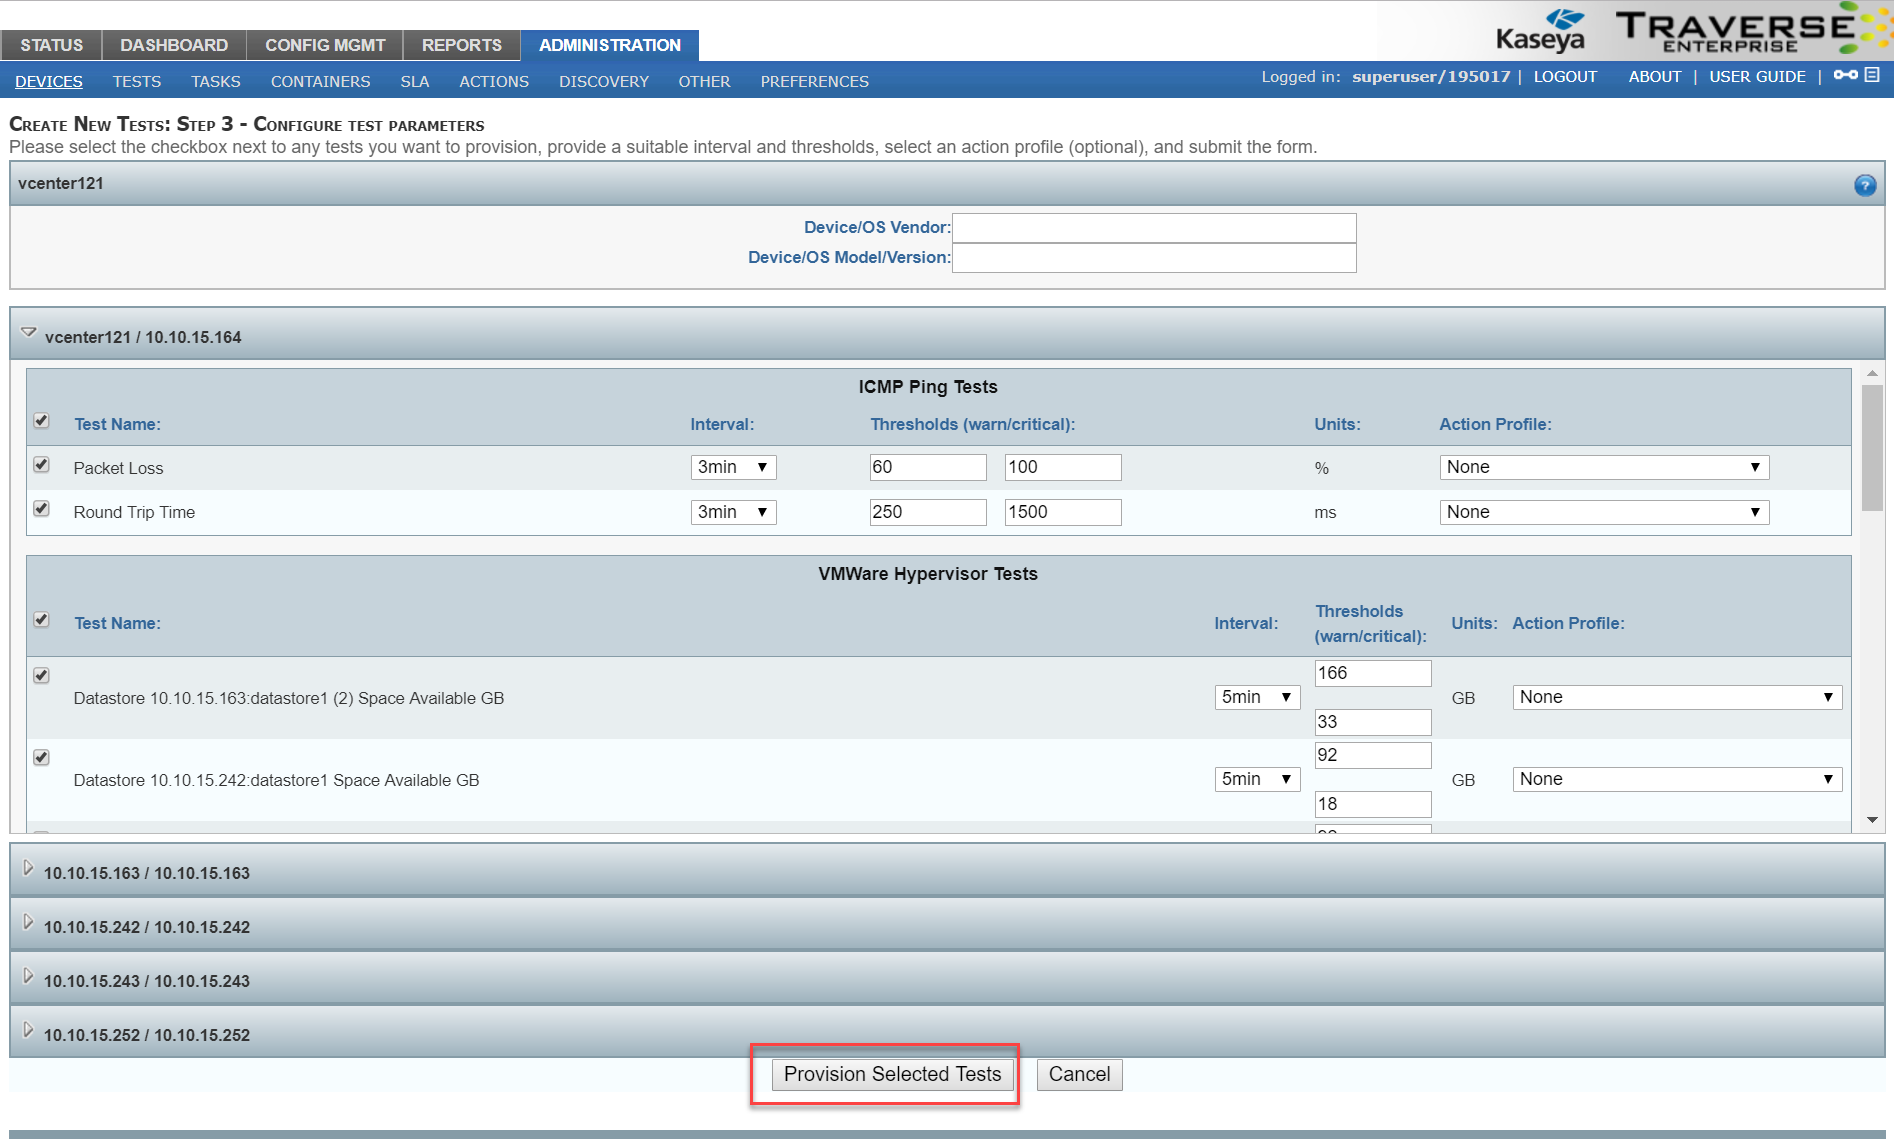
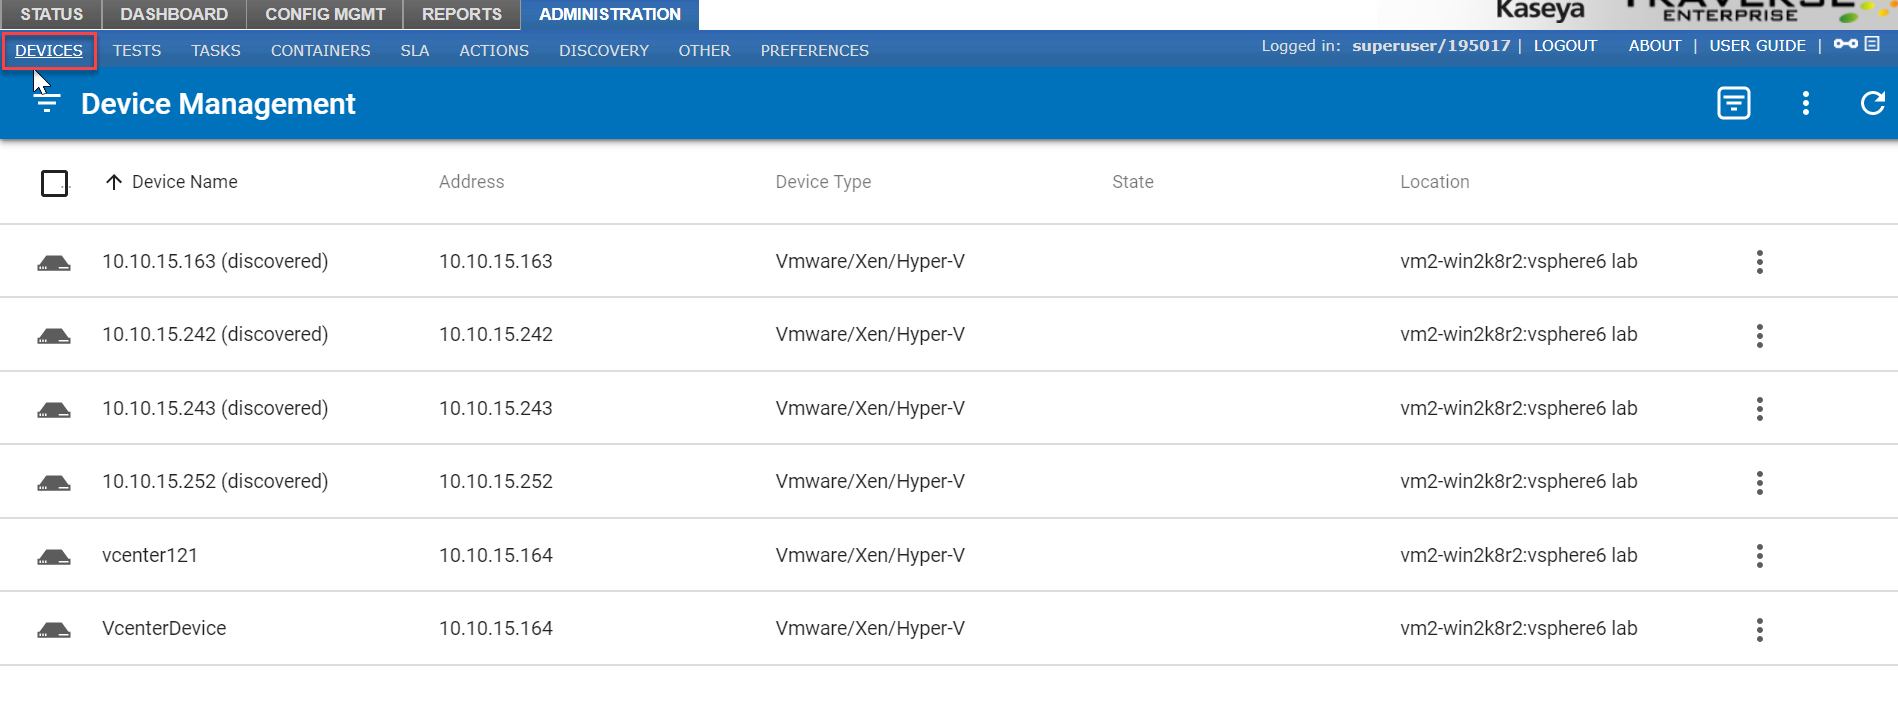
You should be able to see your discovered vmware/esxi devices on Administration >> Devices. [Example screenshot attached for your reference]
