SUMMARY
How to find the cause of common VSS errors.
ISSUE
Windows Client is showing Volume Shadow Copy Service (VSS) errors.
See this KB for examples of specific VSS errors.
RESOLUTION
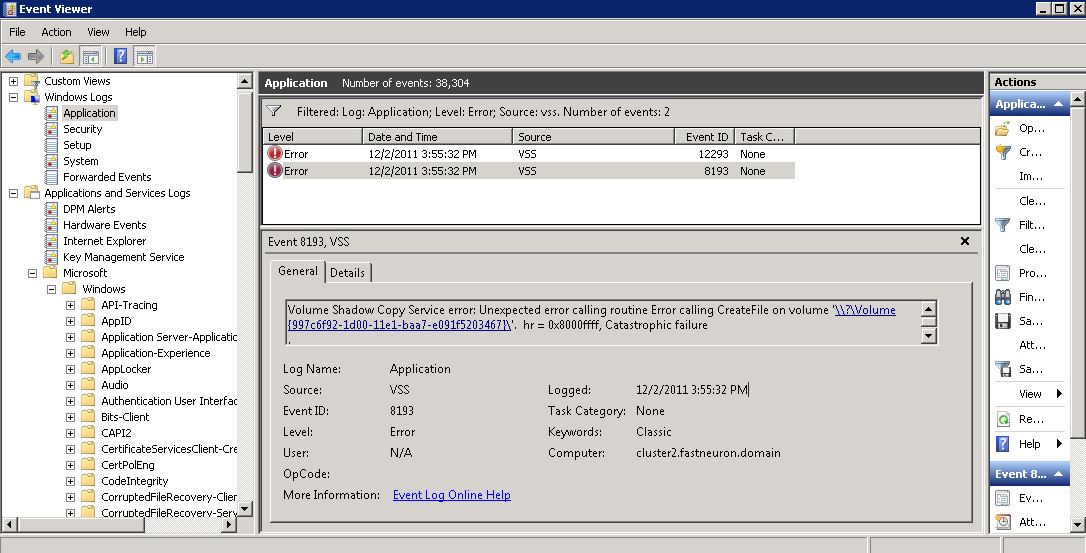
In order to fix Volume Shadow Copy Service (VSS) errors in your system, and before you dive into the details, you need to know exactly what causes these errors in your system. If you encounter VSS failures for your Windows Client, you’ll need to check the Windows Event Viewer as follows:
The error may look like this:

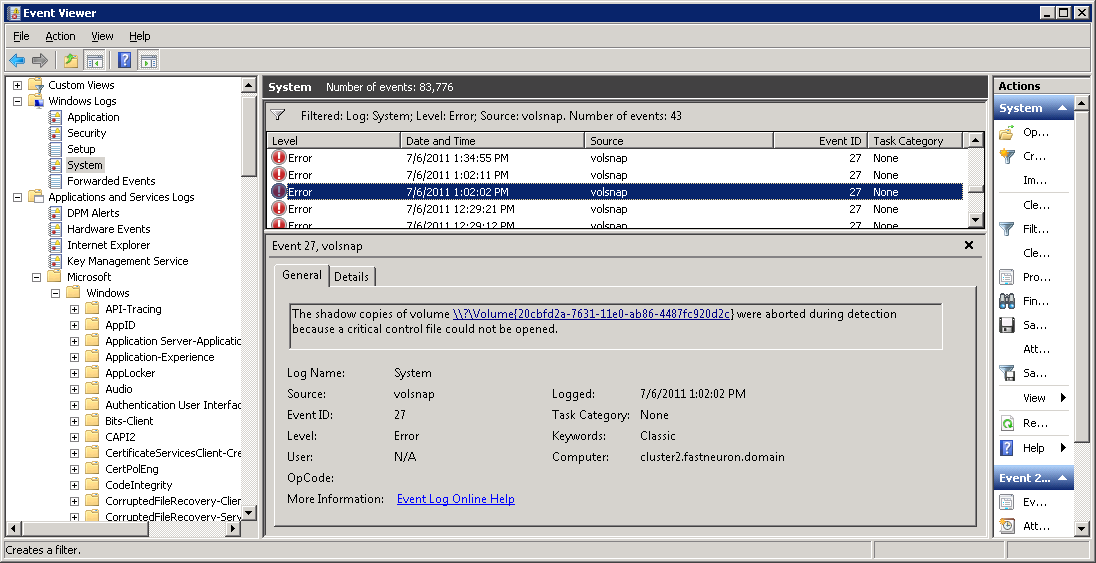
VolSnap entries may look like this:
What you need to do next if you are using Hyper-V, is to check the Hyper-V logs (following section).
It also helps to run a search using your favorite search engine and search for: VOLSNAP 27 or VSS 8193.
You basically use the Event ID and Source in your search to find additional information online on how to fix your particular error.
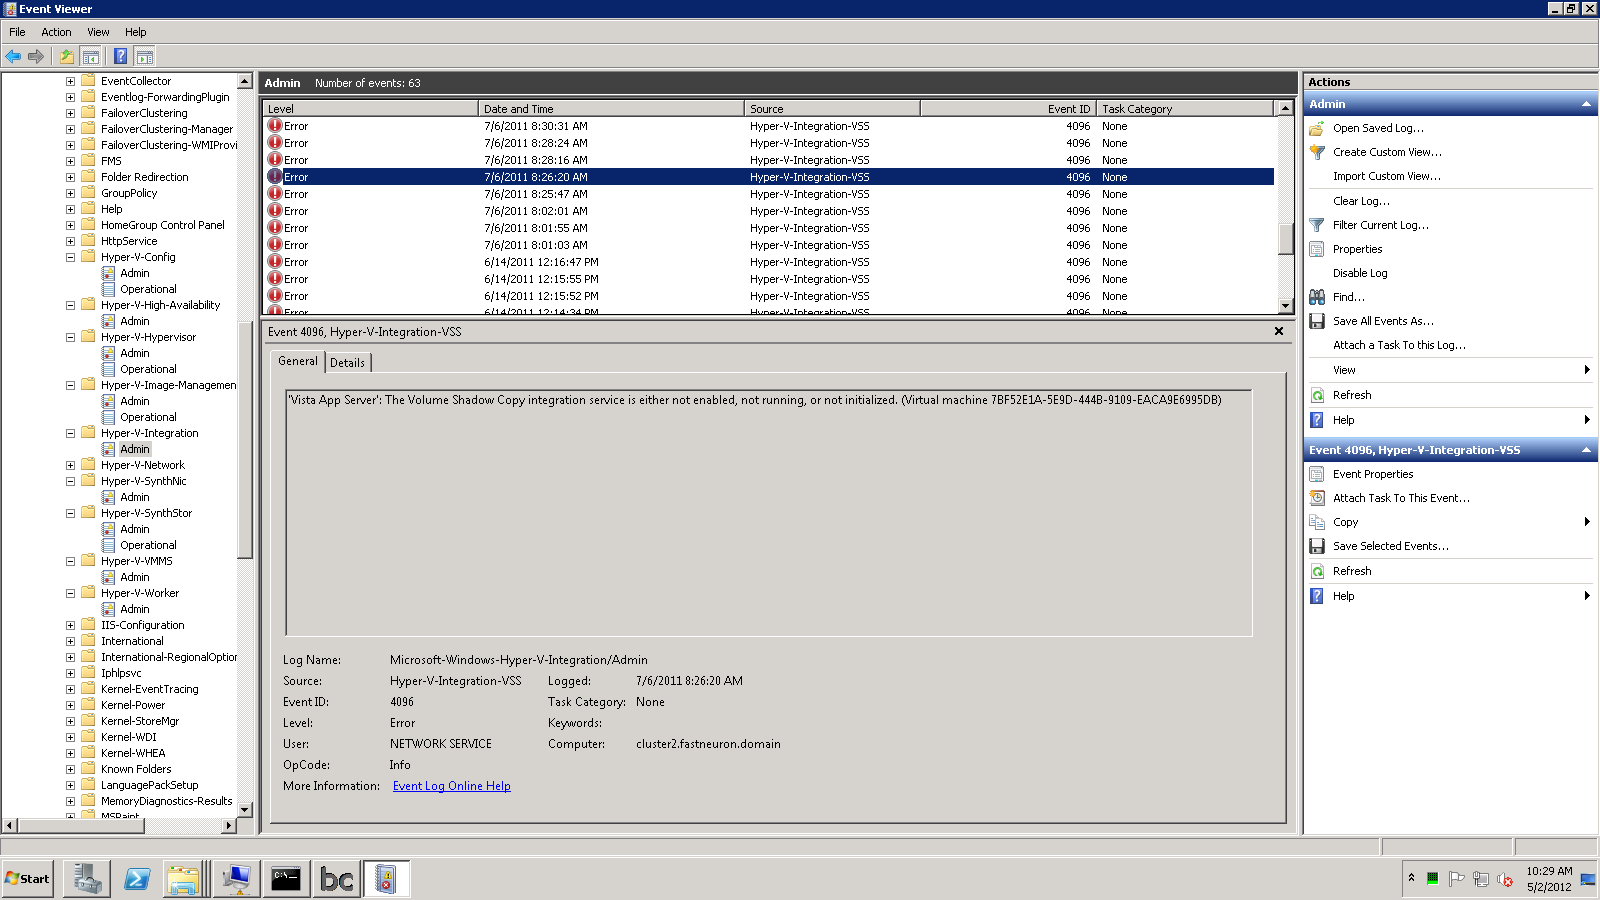
Most of the time, however, the way to fix the error becomes obvious when reading the error message, see the following Hyper-V example:
Volume Shadow Copy Errors
If you are using Hyper-V, you may find additional Hyper-V VSS error information by navigating further down to:
Applications and Services Logs -> Microsoft -> Windows -> Hyper-V XXXXXXX
You will find about a dozen different Hyper-V logs and more often than not you’ll find the answer to your problem right there.
The following example shows that the virtual machine’s Hyper-V Integration Services are not available or installed:
Please collect as much information as possible and export the Event Viewer logs. Contact support for further investigation.
How to Fix Volume Shadow Copy Service: 11 Strategies
Warning: Serious problems may occur if these commands are executed incorrectly. These problems may require redeployment of the server, result in a loss of data, and/or cause system downtime. Unitrends cannot guarantee these problems can be solved and customers should proceed at their own risk.
Step #1: The First Thing To Do Before Attempting Fixes
Check Windows Event Viewer logs and several sub-logs; this will save you hours if not days of work!
This is the most crucial step in fixing the problem: dig through the Event Viewer logs. If you haven’t done this before, it’s a great opportunity to approach it now since the Event Viewer system is where Windows logs almost everything. Once you know the exact cause, the fix is usually trivial.
Repair Strategy #1 of 11
Reboot. For some reason, servers that haven’t been rebooted in a while cause VSS to malfunction. As all Microsoft veterans know, you need to reboot regularly as a preventive and cleanup
measure for your system. Rebooting will eliminate VSS problems caused by transient VSS errors.
Repair Strategy #2 of 11
Open “vssadmin from the command line (run cmd as administrator).
Enter "diskshadow" and then "delete shadows all" or “vssadmin delete shadows /all” on older OSes to clean up any dead / orphaned shadows. Some defect systems accumulate hundreds of VSS snapshots that persist in the system and cause Windows to become unresponsive. WARNING: Do not run this command if the server or workstation is pending a reboot to install Windows updates!
Enter “vssadmin list writers” and check for errors. If you receive errors for one writer, you may need to fix that particular service. It is quite common to receive multiple errors from several related services, such as “VolSnap” and “Disk”.
If you see a VSS error, try the following:
Restart the services:
COM+ System Application
Service, Distributed Transaction Coordinator Service, and Volume
Shadow Copy Service
*Edit* 7-27-16
########################################
Check services for any abnormal state.
Example
Virtual Disk Service is stuck in a "Stopping" state, the process may need to be manually stopped and restarted.
########################################
and also restart the affected service, for example, the Hyper-V VSS writer.
The most important thing to do is to check the Event Viewer for any additional error information logged. Usually, each VSS aware service will have its own logs, most likely inside the Event Viewer.
Run again “vssadmin list writers” to check if the above resolved the problem. If it didn’t follow with the next strategy below:
Repair Strategy #3 of 11
Uninstall all backup utilities on your computer, including Windows Backup if it’s installed. You don’t need to uninstall Unitrends Agent because the Agent doesn’t contain or install any VSS drivers; however, we have seen VSS components of other backup solution developers cause system instability and errors.
After all other backup tools have been uninstalled, open the Registry Editor (Regedit) as administrator and check the following branch: “HKEY_LOCAL_MACHINE\SYSTEM\CurrentControlSet\services\VSS\Providers”
Underneath that key, you should only find Microsoft Software Shadow Copy Provider 1.0 and no other VSS provider (with the exception of Windows Server 2012 and later, where you’ll find several system providers). If you do find another third-party VSS provider registered, it may be a residue registry entry of a previous software installation. You can save the entry by exporting the entire registry to a file (right-click and select Export) and then it’s safe to delete the entire branch entry underneath HKEY_LOCAL_MACHINE\SYSTEM\CurrentControlSet\services\VSS\Provider.
Then reboot and try again running “vssadmin list writers” to confirm the problem has been resolved.
Note: If you are using specialized attached storage that requires its own VSS provider, you may see a driver reference in the above registry key. Please leave those kinds of entries intact.
In addition, on Windows Server 2012 you may find additional system-related VSS providers there, which should also remain referenced
.
VSS Repair Strategy #4 of 11
On some systems, the command vssadmin delete shadows isn't available. In Windows XP that's okay because VSS snapshots can't be persistent on XP (a reboot will get rid off them); however, on Vista/2008 you need to delete old shadows using:
vssadmin Resize ShadowStorage /For=C: /On=C: /MaxSize=320MB
300MB is usually the smallest amount you can specify and will effectively delete any existing VSS snapshots on your system.
If you don't get any VSS writer errors when using vssadmin list writers but the system isn't able to create a new VSS snapshot (and you have deleted all existing snapshots), then you may have to actually increase the max shadow storage size on your system. Use the previous command with a greater number, such as 10GB:
vssadmin Resize ShadowStorage /For=C: /On=C: /MaxSize=10GB
You can choose to allocate a percentage of disk space instead. Microsoft recommends 20%. That command would look like this for the C: drive.
vssadmin Resize ShadowStorage /For=C: /On=C: /MaxSize=20%
Note that it is also possible to allocate shadow copy storage space on a different drive, as along as it's local:
vssadmin Resize ShadowStorage /For=C: /On=X: /MaxSize=200GB
If you receive the following message, check the Volume Shadow Copy service (must be Automatic or Manual) and if VSS capabilities are disabled or broken.
the specified volume shadow copy storage association was not found
If VSS is disabled, you can create it by executing this command
vssadmin add shadowstorage /for=c: /on=c:
Also check this article discussing the VSS error "Cannot find anymore diff area candidates" for instructions on how to set the diff area using the Windows user interface on Server operating systems.
VSS Repair Strategy #5 of 11
You can try to re-register all VSS and COM+ components by running the following commands from the command prompt as an administrator:
These instructions for 32-bit AND 64-bit systems:
cd /d %windir%\system32
Net stop vss
Net stop swprv
regsvr32 ole32.dll
regsvr32 vss_ps.dll
Vssvc /Register
regsvr32 /i swprv.dll
regsvr32 /i eventcls.dll
regsvr32 es.dll
regsvr32 stdprov.dll
regsvr32 vssui.dll
regsvr32 msxml.dll
regsvr32 msxml3.dll
regsvr32 msxml4.dll
regsvr32 Vssapi.dll
regsvr32 Vssui.dll
net start vss
net start swprv
Execute these instructions only on 64-bit systems in addition to the above:
Net stop vss
Net stop swprv
regsvr32.exe /i %windir%\system32\eventcls.dll
regsvr32.exe /i %windir%\system32\swprv.dll
regsvr32.exe %windir%\system32\vssui.dll
regsvr32.exe %windir%\SysWOW64\vss_ps.dll
regsvr32.exe %windir%\SysWOW64\msxml.dll
regsvr32.exe %windir%\SysWOW64\msxml2.dll
regsvr32.exe %windir%\SysWOW64\msxml3.dll
regsvr32.exe %windir%\SysWOW64\msxml4.dll
regsvr32.exe %windir%\SysWOW64\ole32.dll
regsvr32.exe %windir%\SysWOW64\oleaut32.dll
regsvr32.exe %windir%\SysWOW64\es.dll
regsvr32.exe %windir%\SysWOW64\comsvcs.dll
vssvc /register
net start swprv
net start vss
net stop winmgmt
regsvr32 wmiutils.dll
net start winmgmt
VSS Repair Strategy #6 of 11
If the PC or server you are using is a virtual machine host, you need to install the latest VMware Tools (for VMware), Virtual Machine Additions (Virtual Server), or Hyper-V Integration Services (for Hyper-V and Windows Server 2008) on each virtual machine. Try updating them if you have them installed already. Outdated integration services can cause various VSS errors.
VSS Repair Strategy #7 of 11
Your computer may have a corrupt COM+ subscription information. Open the registry editor (Regedit) and navigate to:
HKLM\Software\Microsoft\EventSystem\{26c409cc-ae86-11d1-b616-00805fc79216}
Then delete the Subscriptions key and reboot the machine.
A subsequent call in the command prompt should show no more errors: vssadmin list writers
This VSS repair strategy appears to work well when the System Writer is reporting an error. The Event Viewer may be reporting this or a similar error:
Writer Class Id: {e8132975-6f93-4464-a53e-1050253ae220}
Writer Name: System Writer
Writer Instance ID: {34162f4c-59ff-468e-848d-cb4b3d8dd7dc}
VSS Repair Strategy #8 of 11
Remove or uninstall all backup tools on your computer. Unitrends Agent doesn't need to be removed because it doesn't add a VSS writer to your system. Other products, however, do add a VSS writer which may be causing the problem. You may receive this error:
Volume Shadow Copy Service error: A critical component required by the Volume Shadow Copy service is not registered. This might happened if an error occurred during the Windows setup or during the installation of a Shadow Copy provider. The error returned from CoCreateInstance on class with CLSID {faf53cc4-bd73-4e36-83f1-2b23f46e513e} and Name VSSEvent is [0x80040154]
Several users reported that after uninstalling Acronis this error message disappeared.
VSS Repair Strategy #9 of 11
Try uninstalling the virtualization tool you're using (Microsoft Virtual Server, Hyper-V, VMware, etc.) one-by-one, then reboot the client. On some machines, this strategy worked when everything else failed.
Once you get VSS working again properly, install the virtualization platform again from scratch and retest VSS.
VSS Repair Strategy #10 of 11
Install the latest Service Packs and Updates through Windows Update.
Check Microsoft's Support for hotfixes and other updates to repair VSS.
VSS Repair Strategy #11 of 11 (VSS Error Code 800423f3)
If the VSS error code 0x800423f3 is reported, the reason is a corrupt state of WMI (wmiutils.dll). This may happen if a registry cleaner was used or a third-party application was uninstalled incorrectly. What you need to do is re-register wmiutils.dll and then restart the WMI service.
In the command prompt, execute the following three lines (note that stopping the WMI service does NOT stop VMs, it only stops the management service):
net stop winmgmt
regsvr32 wmiutils.dll
net start winmgmt
After that, you should start up the Hyper-V Management Service again if needed.
Another cause for this error: You may need to update your Hyper-V virtual machine integration services inside of each VM when you come across this error. See https://docs.microsoft.com/en-us/previous-versions/windows/it-pro/windows-server-2008-R2-and-2008/dd582376(v=ws.10). Check the vmguest.iso date/time you have in your system folder. You may have different versions of the Hyper-V Integration Services CD on your system. There have been bug reports indicating that Hyper-V uses the wrong ISO file when the VM Action menu is used to install the Integration Services. Try attaching the ISO manually and use the latest vmguest.iso in your system folder.