Introduction
Take your Kaseya PSA integration even further with PSA Live Ticketing in IT Glue. This feature allows you to open, update, and resolve PSA tickets directly in IT Glue without having to switch between the applications. Follow this article to set up PSA Live Ticketing in your IT Glue account.
Prerequisites
- You must have an active integration set up with Kaseya PSA with "Enable Ticket Integration" checked on. For details, refer to our Integrating with PSA KB article.
- Users must have access to an IT Glue organization to view tickets associated with it.
Initial Sync
After you have set up an active integration with Kaseya PSA, the initial bulk sync will bring in all of your tickets from PSA to IT Glue. Please note that, depending on the amount of data you have, it may take a few hours for all results to appear.
Note: Please note that depending on the volume of your tickets in BMS to be synced with IT Glue, the expected time delay for when these tickets appear on IT Glue will vary.
Navigating a PSA Service Ticket
All your PSA ticket data will be displayed in one of the four sections on the page:
- Main panel
- Ticket tabs
- Side panel
- Sub-tabs
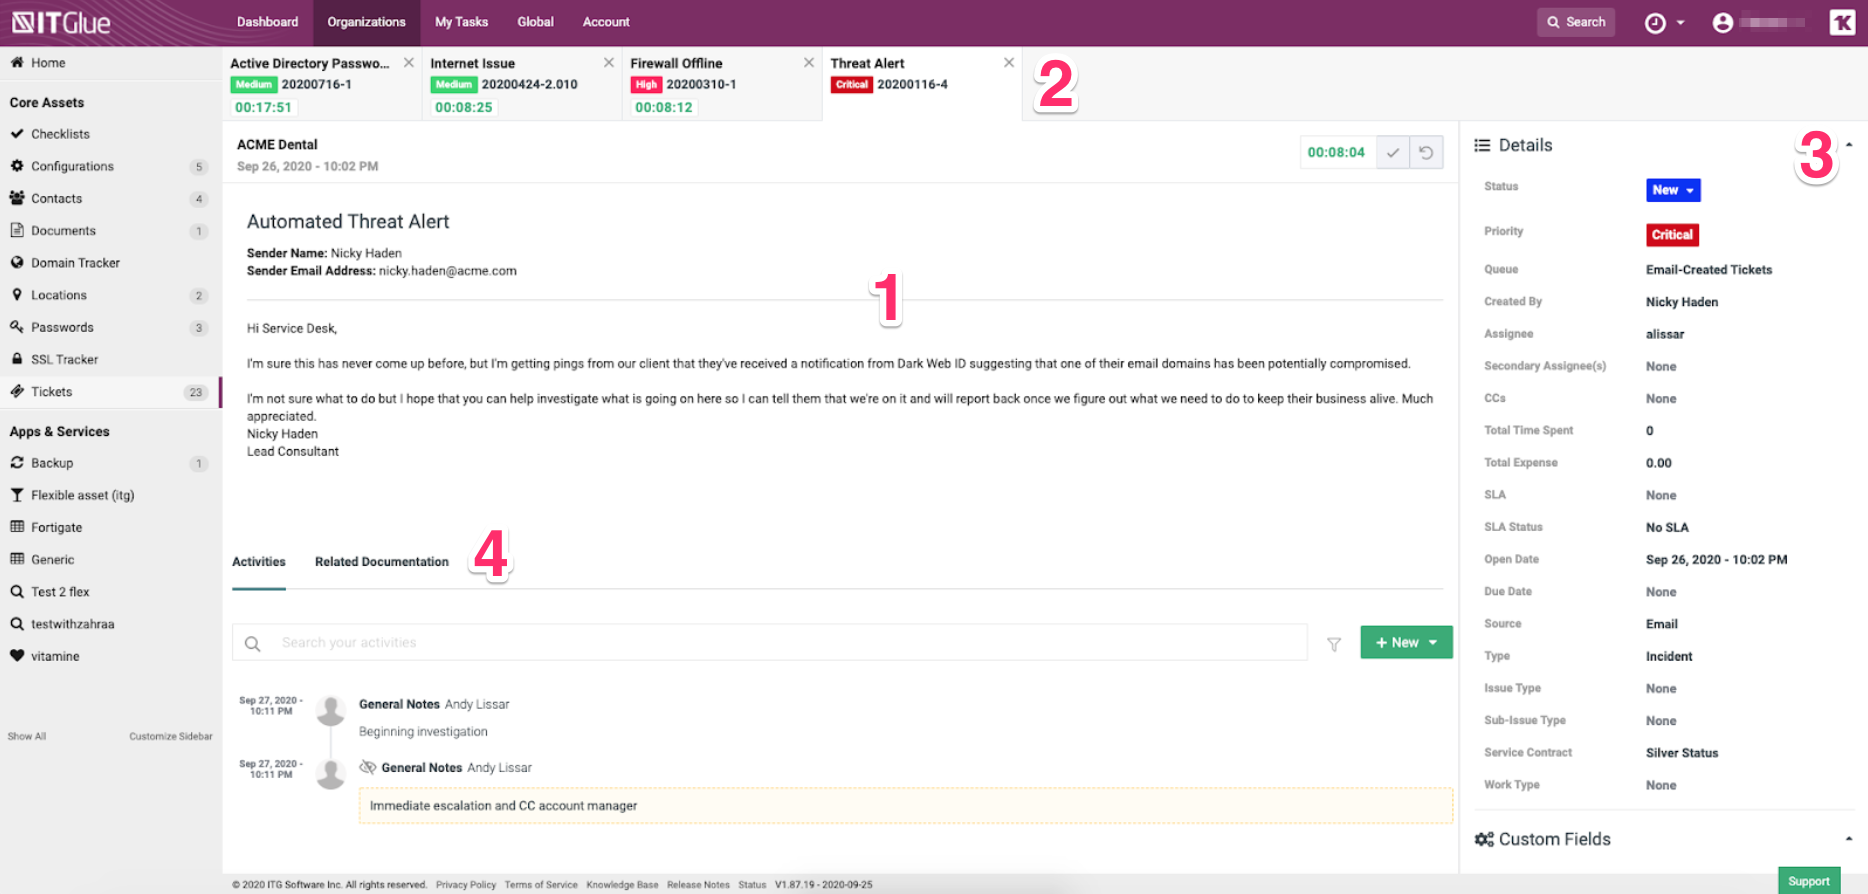
1. Main Panel
Navigate to Organizations > Tickets to access your Ticket list view. Clicking any of the line items will open the associated ticket. The ticket details appear in the middle of the page. Click the Read More button to see the entire description.

In the main panel, you will need to manage your committed time on the open ticket. Click the checkmark next to the timer to open the Time Log form. For each time log, there is a running timer that starts counting from zero once the ticket is opened and continues to run while the time log form is open. Note that if you manually adjust the start time or the committed time on the ticket, the timer will stop. You have the ability to restart the timer on any open ticket by clicking the restart button.
2. Ticket Tabs
The top of the ticket page displays a tab panel with all tickets that are currently open. Clicking any of these tabs will bring the corresponding ticket to the foreground. Each of these tabs displays the title, priority, ticket number, and a running timer. You can preview a ticket by hovering over the ticket tab and also rearrange the order of the tabs if desired. To close a tab, click the x icon on the tab.
![]()
You can start and stop the timer directly from the ticket tab. The timer starts counting from zero once you open a ticket. If you have a ticket open in multiple browser tabs, each timer starts from zero and can be committed. Note that navigating away from the ticket or closing it will discard any uncommitted time.
3. Side Panel
The ticketing side panel is where you can quickly browse details regarding Custom Fields, RMM Integration data, Ticket Contacts and history, Affected Assets, Attachments, and Duplicate Alarms on the ticket.
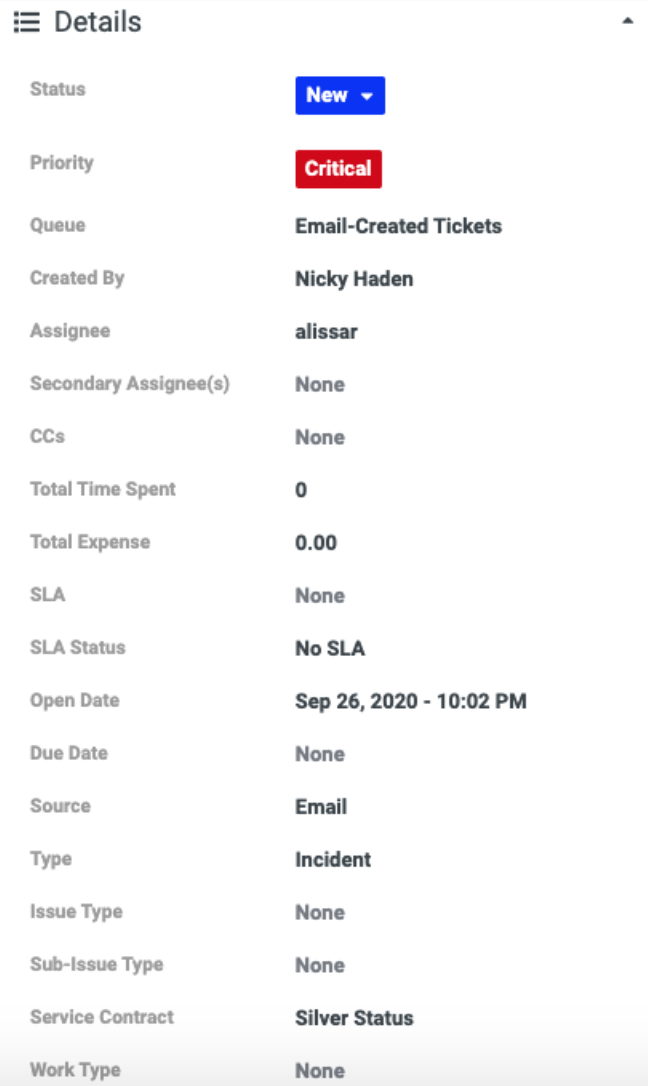
- Details - View Status, Priority, Queue, Created by, Assignee, Secondary Assignee, CCs, Total Time Spent, Total Expense, SLA, SLA Status, Open Date, Due Date, Source, Type, Issue Type, Sub-Issue Type, Service Contract, and Work Type.
- Attachments - Drag and drop your selected file into the dotted line field to upload the attachment.

- RMM Integration - This section will only appear if there is an active RMM integration (VSA or Continuum).
- If a Kaseya PSA / VSA integration is enabled, the ticket displays the ticket number as read-only.
- If a Kaseya PSA / Continuum integration is enabled, both the Ticket Owner field and the ticket number are displayed in read-only mode.
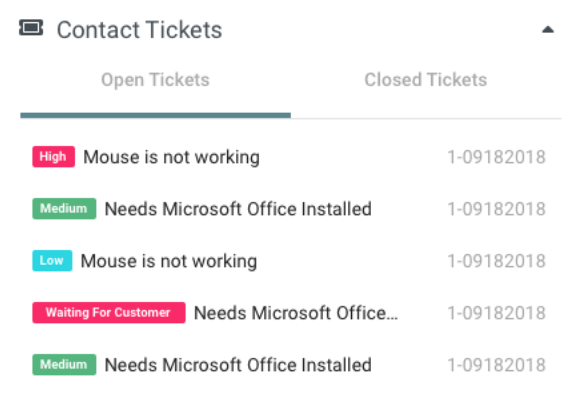
- Ticket Contacts - Toggle between the Open Tickets and Closed Tickets sections that display the last five tickets, respectively. These are sorted in the order of the most recently opened/closed for the particular contact. Clicking on a ticket title will open it in a new ticket tab.
4. Sub-Tabs
There are two sub-tabs located at the bottom of the ticketing main panel: Activities and Related Documentation.
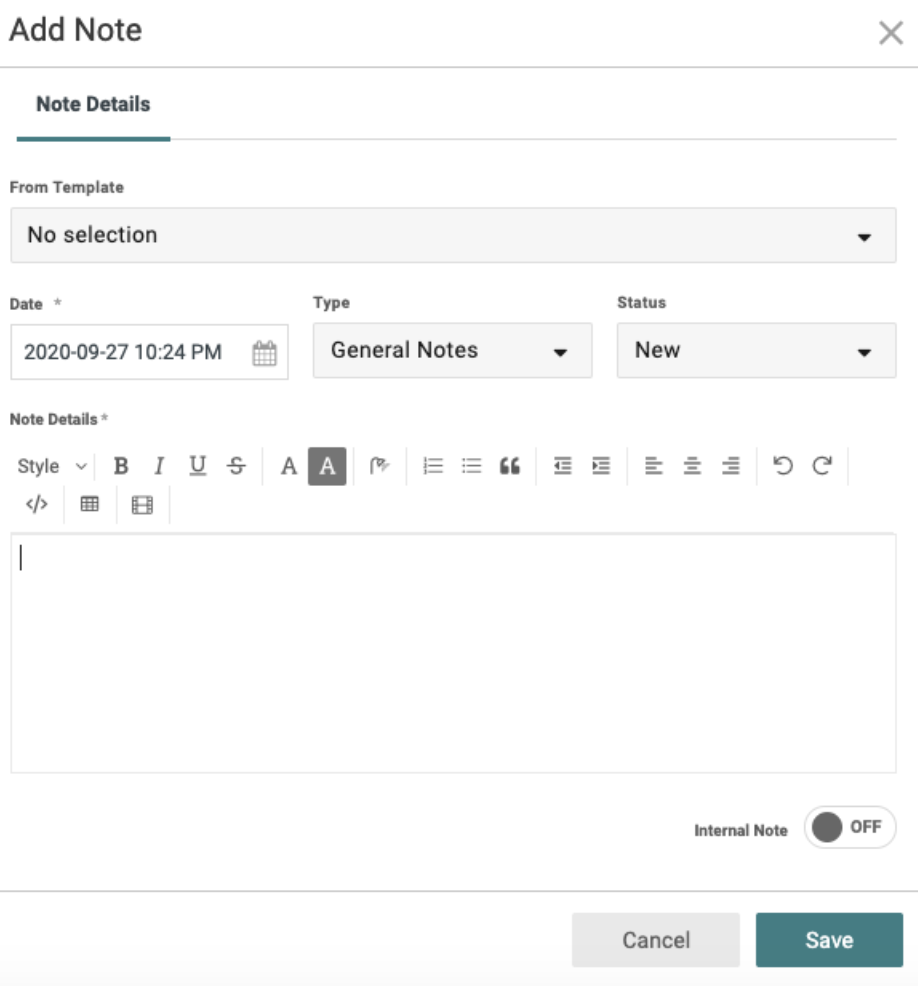
- Activities - This is an up-to-date log of all notes and activities related to the ticket. This section will also show updates to any of the ticket’s details. You can filter the activity log by one or more types of activities or search through the log’s content. To add a new note, click the green + New button beside the search bar and select Add Note.
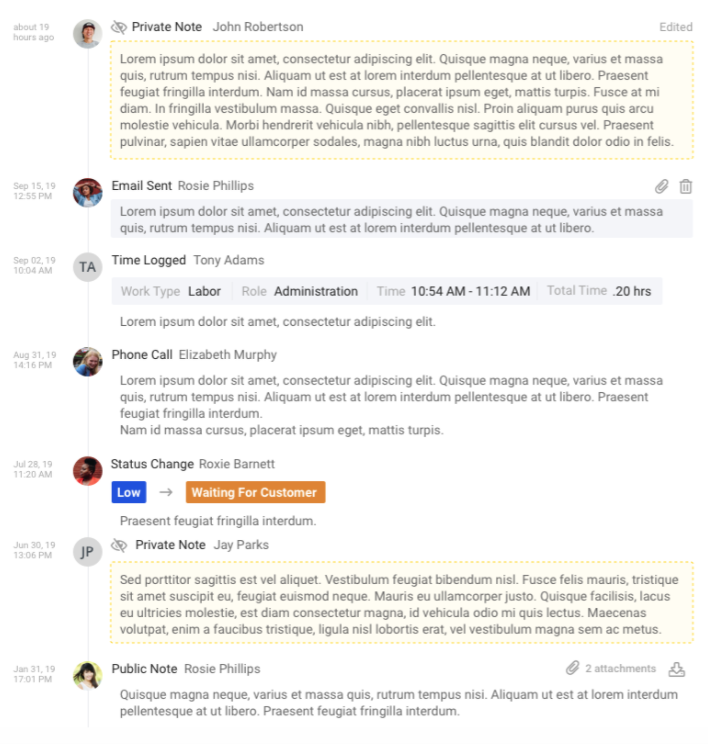
- In the Note Details tab, select a template macro, select a date (today’s date is the default), type, status, and enter your comments. Click the Internal Note toggle switch to ON if you want your comments to remain private.
- Related Documentation - This sub-tab will display content based on the PSA Ticket Settings you configured in IT Glue. For full details, refer to our Suggested IT Glue documentation in PSA tickets KB article.
- Documents - Clicking on the document title redirects you to the asset in IT Glue.
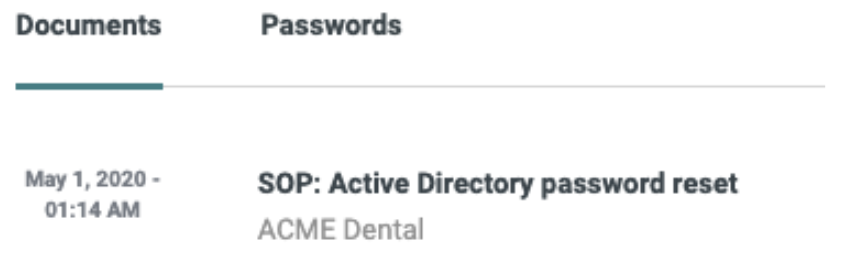
- Passwords - Clicking the password redirects you to the asset in IT Glue. Click the Copy button in order to copy it without viewing. For vaulted passwords, you will need to enter your user-specific passphrase first.

- Documents - Clicking on the document title redirects you to the asset in IT Glue.