Organizations within Passly allow you to keep separation between your customers, as well as your organization.
To access your Organizations, Click Directory Manager > Organizations.
You will be taken to a screen that displays all of your active organizations, listed by Name, Domain and Status. You will also see a Default Organization already setup for you. To view it, click its name.
Default Organization

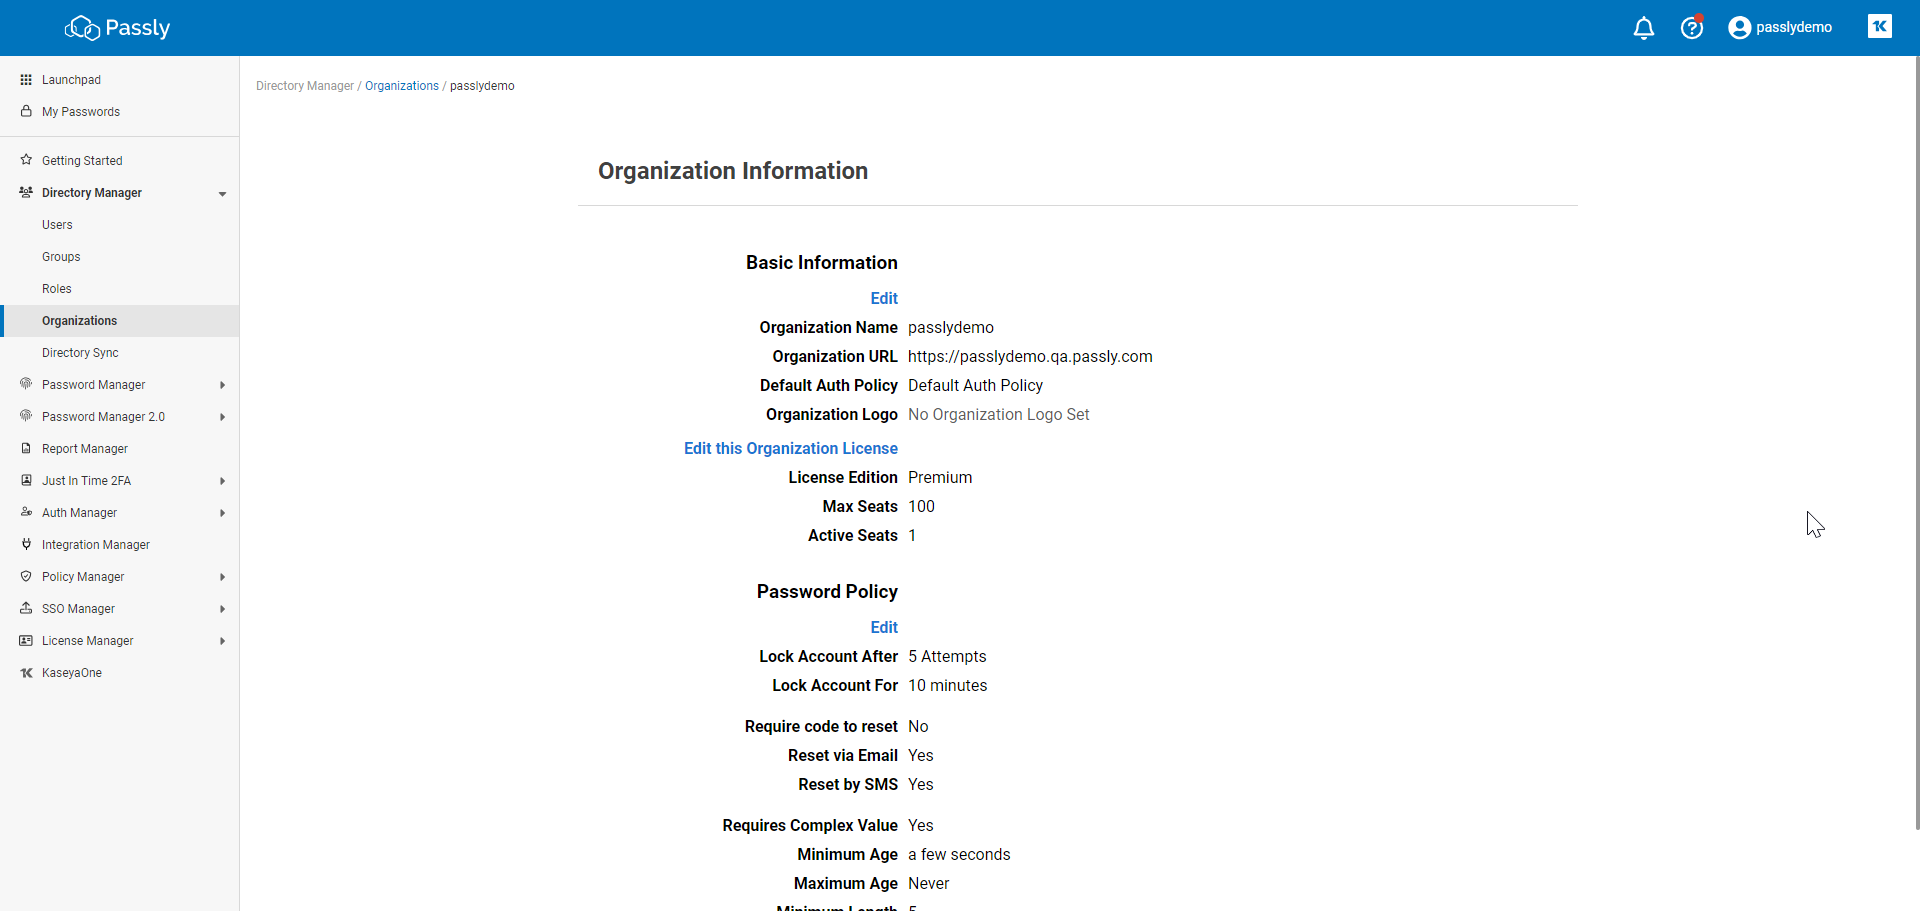
When you click on the default organization, you will be taken to the organization’s detailed overview. To edit the default Organization, click Edit.
Unlike custom organizations, you cannot edit certain details of the organization. While you can change the name and the logo, you cannot change whether or not the Organization is the default.
Create a New Organization

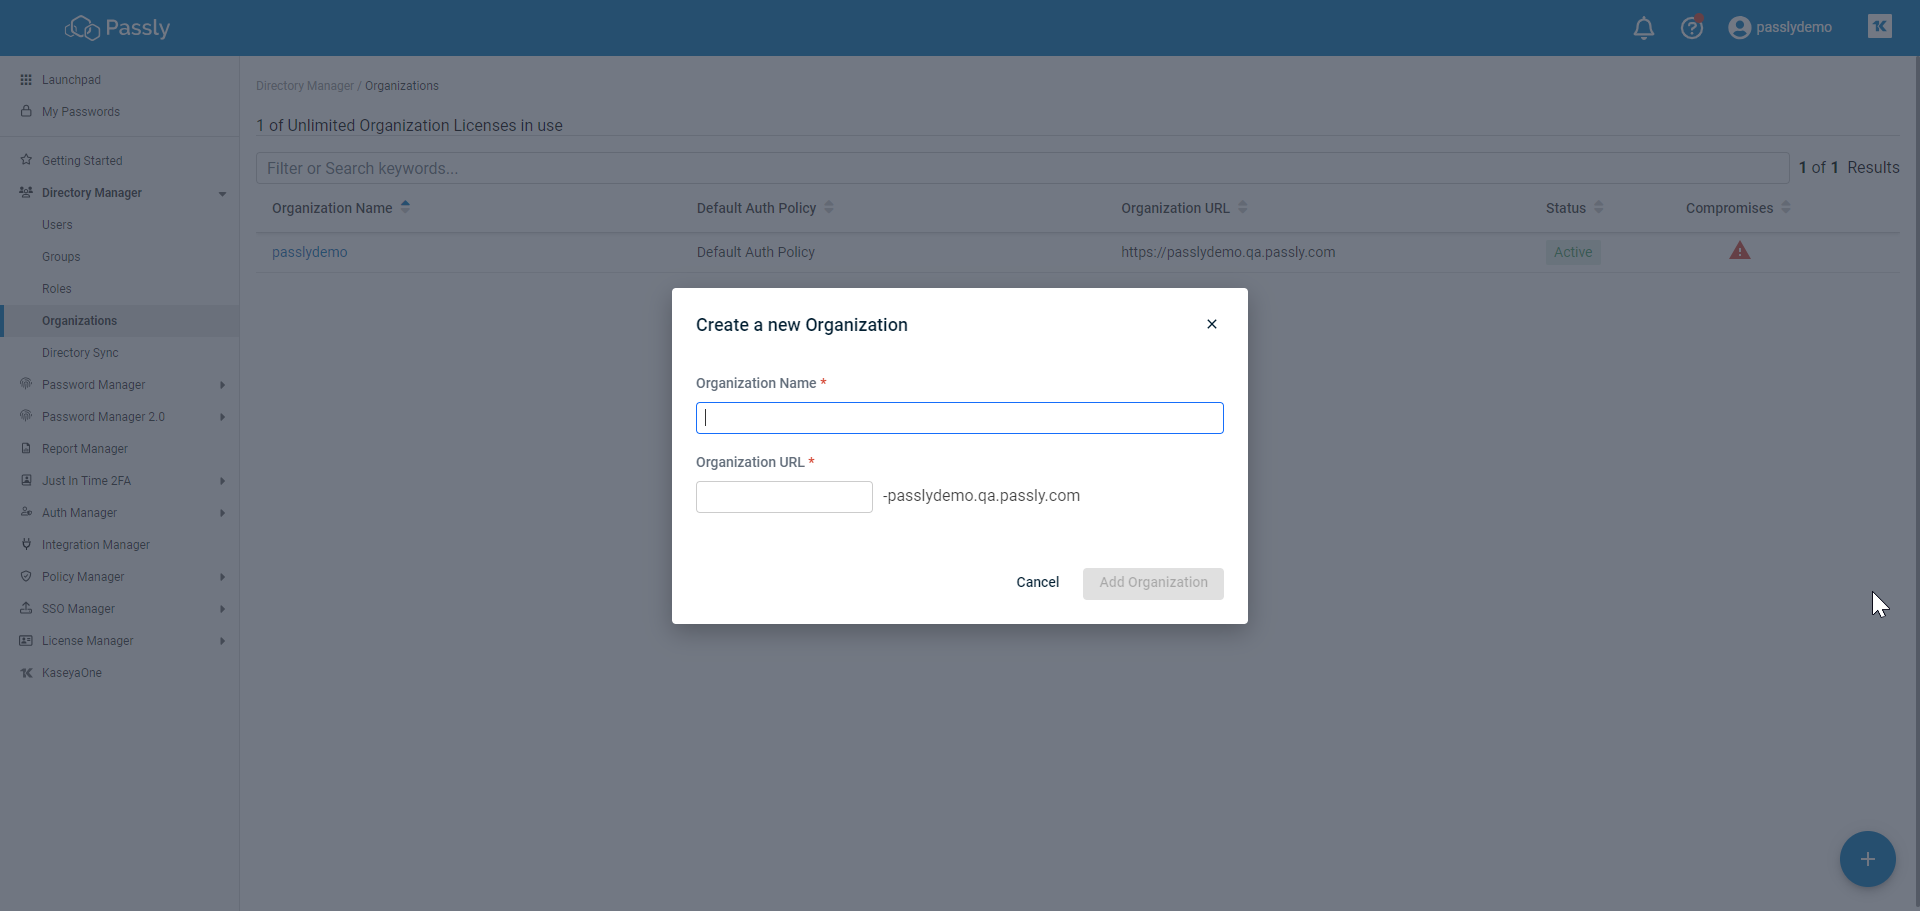
A menu will appear on the right-hand side prompting you to Create an organization. To do so, give your organization a Name. The URL below it will automatically fill in with the Name and a “-” prefixing your tenant (Ex: MyOrganizationName-mytenant.passly.com). You can change that to something else if you prefer, though they will have to be unique within your tenant. When your users log into your Passly, they will be able to access their organization within your tenant. Once you’ve finished creating a new organization, proceed to the next step.
Editing an Organization
Once an organization is created, you are able to edit the details of it. To edit an organization, simply click its name, or the three dots on the right hand side of the screen. You have two categories of information to edit: Basic Information and Password policy. Click on “edit” under either one to begin.
Basic Information

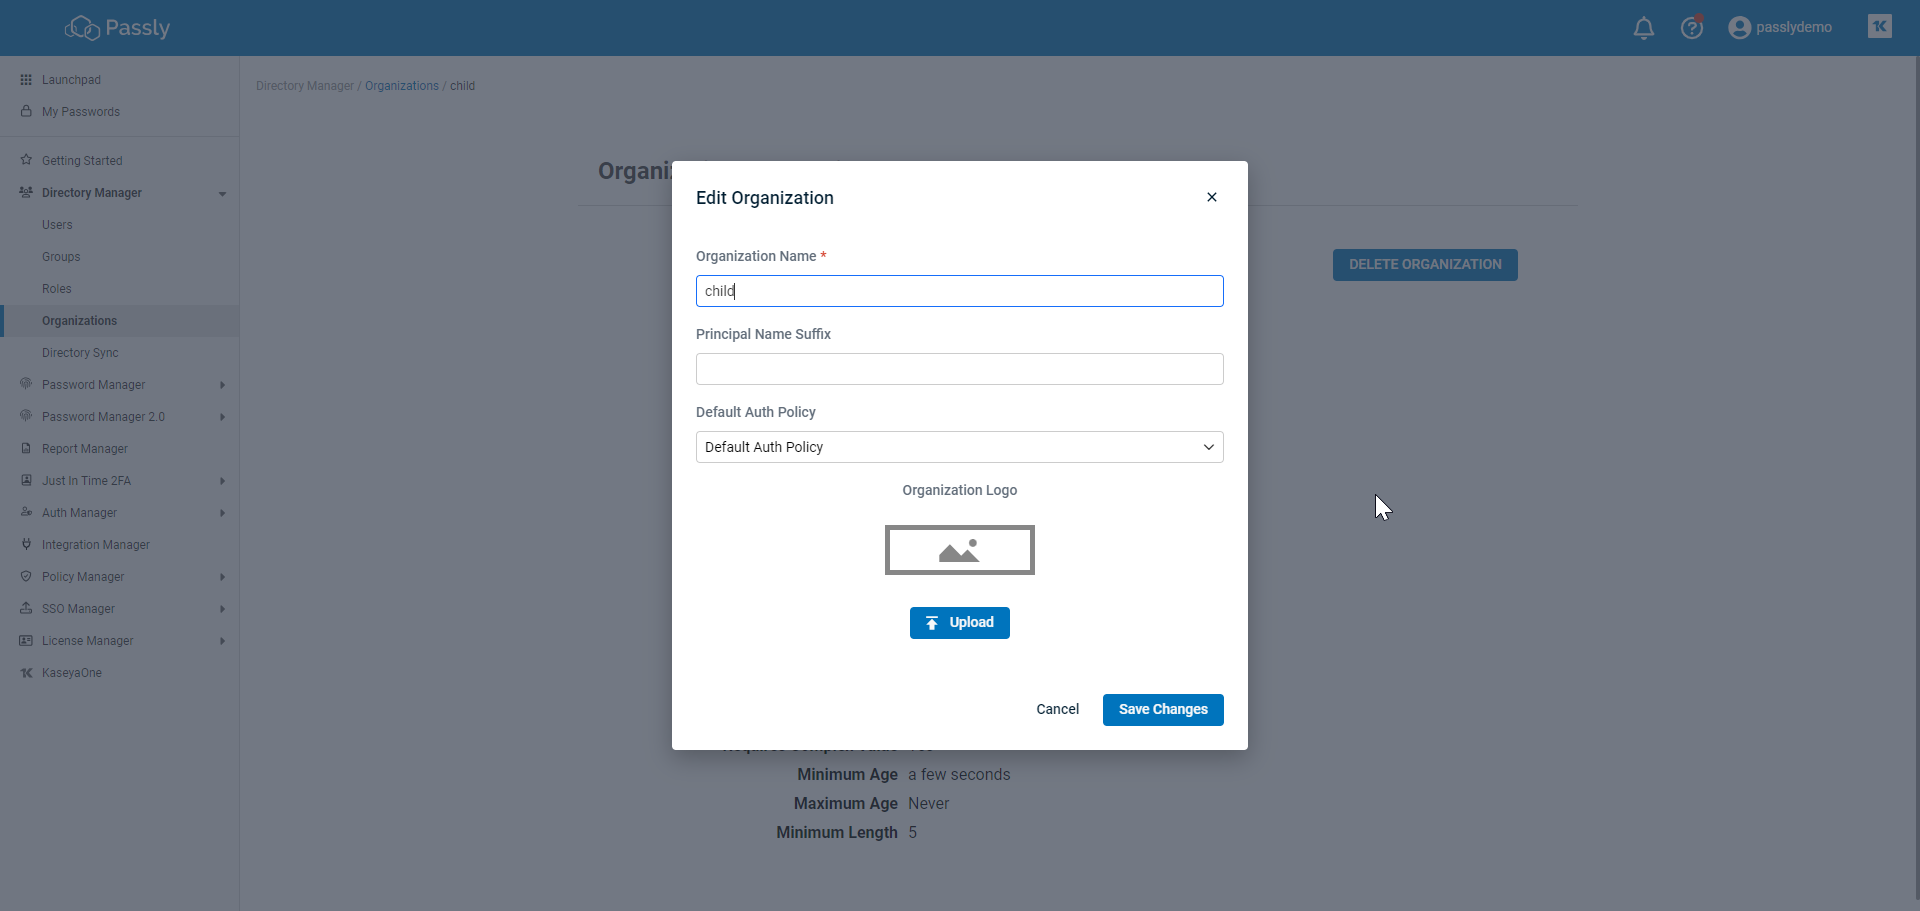
From the side menu, you can rename your Organization’s name (but not URL), Principal Name Suffix, Auth Policy (see: Authentication Policies), Organization Logo. Once you have finished editing these settings, click “save changes”.
Password Policy

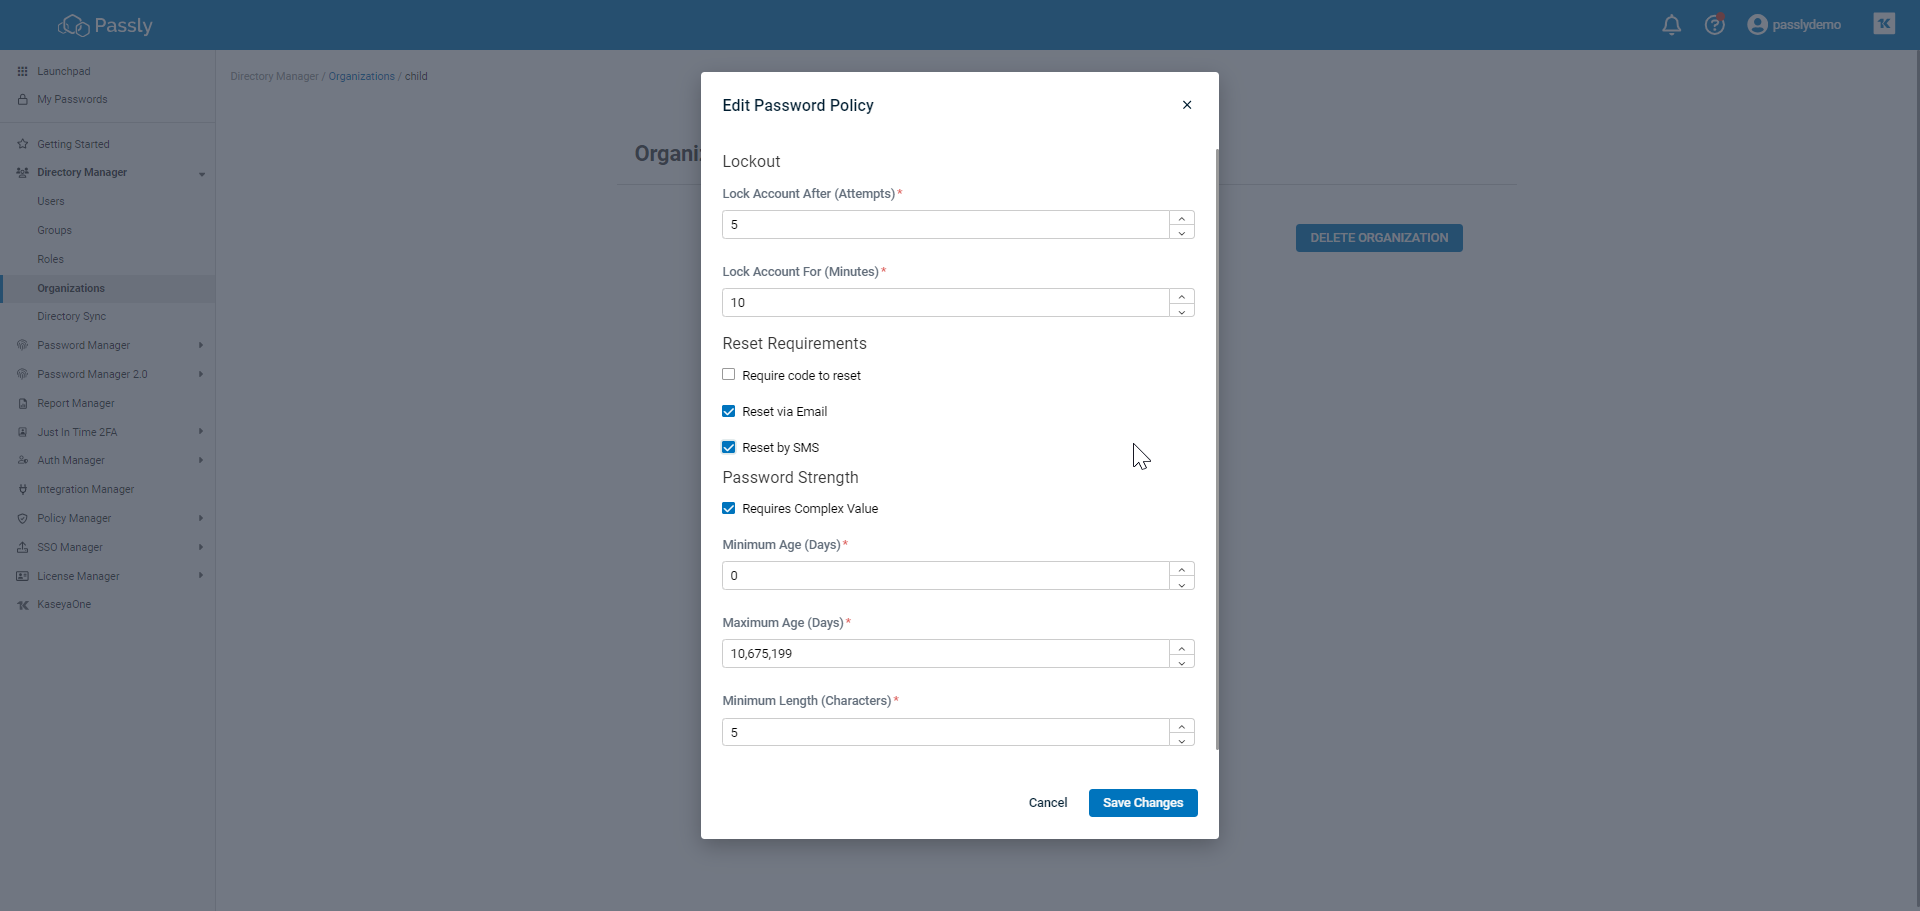
While you can create a more general password policy under the Password Server settings, this option will allow you to directly customize settings for login credentials at an organization level. These options include:
- Lockout
- After x attempts: If you suspect an individual may attempt to enter Passly by guessing a user’s login credentials, you can set the amount of attempts it would take to lock the individual out.
- For x minutes: After an individual has attempted and failed to enter the proper login credentials for the amount of tries you have allotted, the system then will refuse access to their IP address for a time frame set by you.
- Reset Requirements: You can set to have a password reset request sent to a phone, email or via a generated code by selecting one or more of the checkboxes.
- Password Strength: By selecting Requires Complex Value, you are opting for more secure password requirements.
- Minimum Age: This sets how old a password must be before it is required to be changed again.
- Maximum Age: This sets how old a password can be before it is required to be changed again.
- Minimum Length: This sets how long a password must be (in character length) when a user creates a new password. While a longer password is more secure, it may also be more difficult to remember without a password manager.
Once you have finished finalizing your password policy settings, click “save changes”.
License Allocation
When you are an admin of a Passly tenant, you have control over how many people within your organizations will be granted Passly access. This process, called License allocation, can be accessed under License Manager > License Allocation.
This page is your main dashboard for managing your licenses. At the top of the page, your licenses are displayed, arranged by Assigned, Allocated, and Licensed. Assigned Seats are Seats that are actively used by the organization. Allocated Seats are seats that have been granted to you to delegate to your organizations in accordance with your Licensing package. To edit these seats, click on the name of the Organization.
This screen allows you to allocate seats for your selected Organization. After selecting your license, select the amount of seats you want to allocate by entering the number. Passly will automatically calculate the seats you have available versus the seats remaining in your license, affecting the total displayed in the top bar of the License Allocation Dashboard. You cannot allocate more seats then you have, and added organizations must have their allocated seat number taken from the total number of seats available. Once you have selected your desired seats, click “Save”. (Note: You must allocate at least 10 seats for your default organization.)
Shared Components
Between organizations, certain Passly configurations overlap and are shared regardless of the organization’s users and groups. Primarily, these shared components come in the form of the policies you create when initially onboarding policy. These include:
- Authentication Policy
- Provisioning Policy
- Password Policy
These components are universal for your Passly tenant and can be used across your organizations.
Switching Between Organizations
As you navigate across Passly, there are several areas in which you can toggle between Organizations using a dropdown menu in the top right hand of the screen (highlighted in the screenshot below).
Just in time 2FA
For this tab we do not use the top right corner drop-down for a switch, you will see all the organisations listed vertically with the Just in Time username.
The following pages in which you can switch between viewing different organizations are as follows:
- My Passwords
- Directory Manager
- Users
- Groups
- Roles
- Directory Sync
- Password Server
- Password Reminders
- Vault Managers
- Agents
- Import Passwords
- Migrate On-Premise Server
- Integration Manager
- Dark Web ID
- BullPhish ID
- Auth Manager
- Agents/Clients
- Logs
- SSO Manager
- Application Library
- Workflow Requests