Parts required: Replacement drive
Tools required: Standard Phillips screwdriver
Access required: Will need access to top cover and bottom of appliance and possible side if retaining screws are still in place
Step 1: Shutdown appliance via the UI
[Animated Tutorial] How to Shutdown the Appliance
Step 2: Remove cover:
- Remove power from appliance
- Unrack or move to allow for access as needed
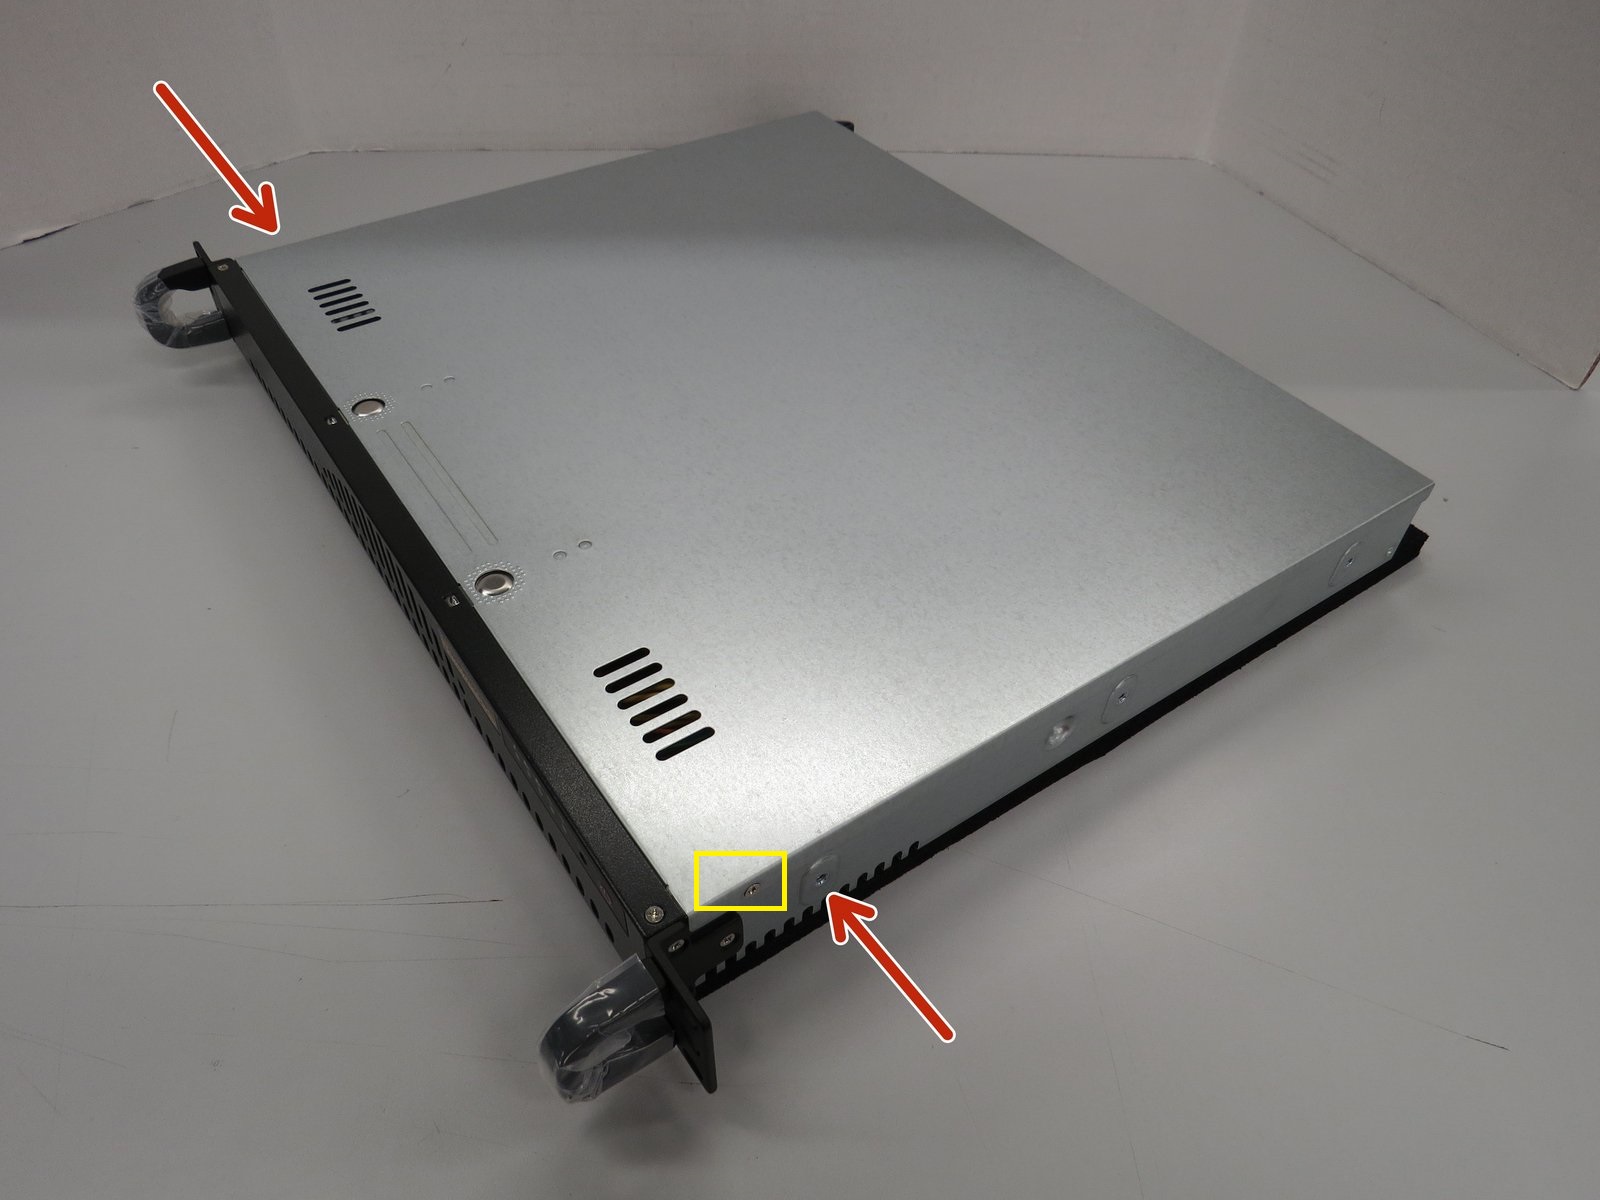
- Remove the two lid screws. (may have already been removed)
-
Remove the lid from the chassis via pressing middle buttons and sliding back top cover

Step 3: Remove then replace disk
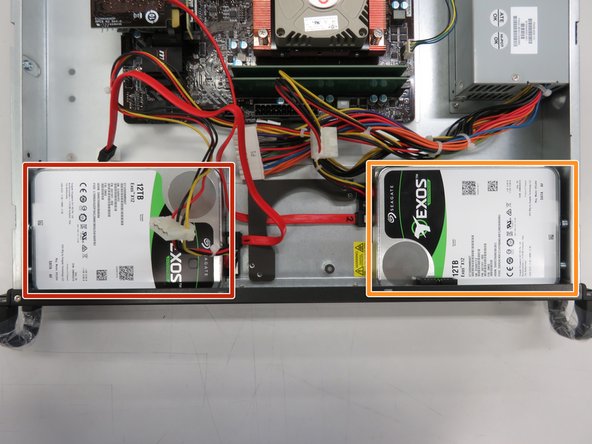
- Match old disk to original S/N provided previously
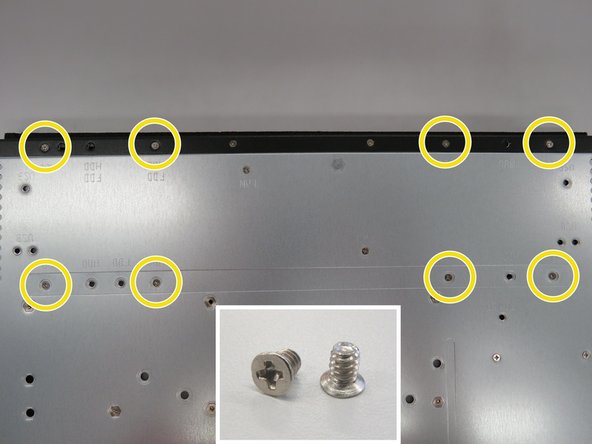
- Drive is secured to the chassis by 4 screws each from the underside of the chassis
- Once screws are removed drive should be able to disconnect and pull out vertically
- Secure and connect new disk


Step 4: Close appliance and power on
- reverse steps 3 & 2 to close appliance lid and secure back to previous rack/mount position
- reconnect power and press power button on front to power on
Step 5: Rebuild disk into raid
- Notify support that the drive is replaced for support to start rebuild of disk this model line currently does not auto-rebuild the disk on detection.