To configure Service Now in the Single Sign-On Manager please follow these steps.
- Log into your On-Demand Tenant.
- Select SSO Manager.
- Select the
 sign in the bottom right corner.
 - Select the
 icon.
icon. - Select Service Now from the Catalog.

- Give the Application a name.

- Enable the Application.
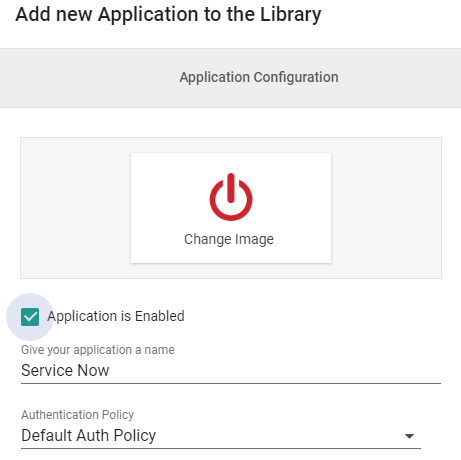
- Select the preferred Authentication Policy.

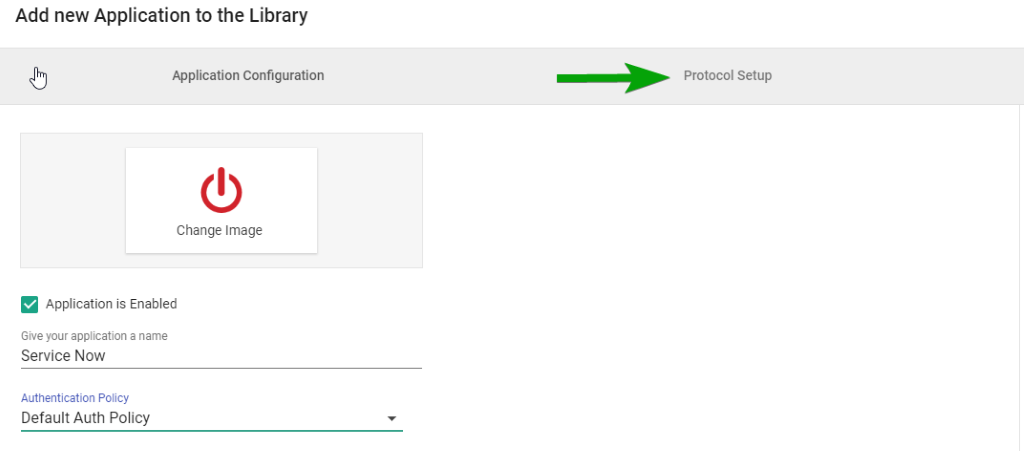
- Select Protocol Setup.
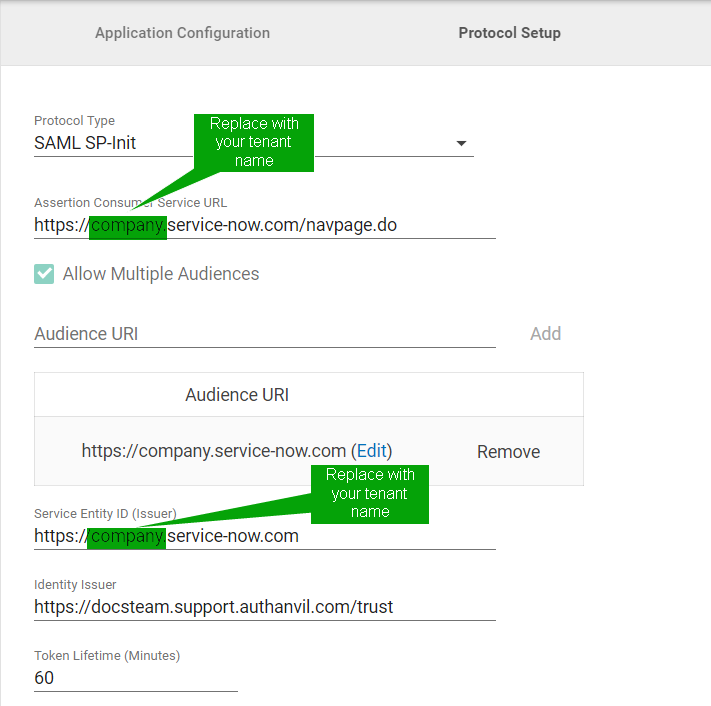
- Replace the words company with your tenant name on Service Now.
- Select Add Application.
- Select Permissions.
Note: Here is where you will define the User groups that will have access to the App.
- Select Signing and Encryption.
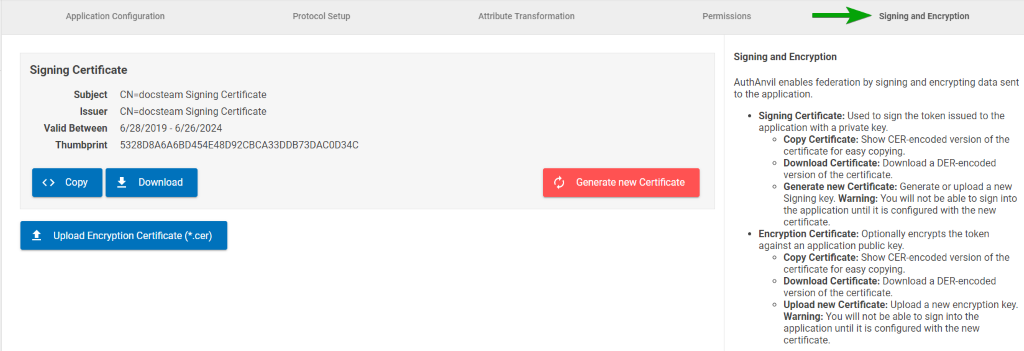
- Select Copy or Download.
- Copy the encoded certificate
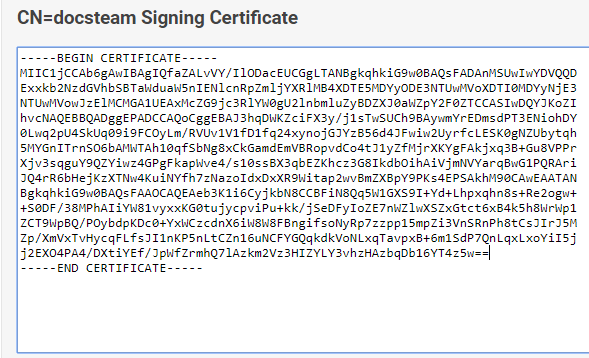
Note: Save this using a notepad document using a .CER file type. You will need this for the Service Now part of the configuration. - If you need to map any attribute of a user to claims of any type, select Attribute Transformation.

- Select Just issue an attribute as the username, to use a predefined token profile.

- Select Specify custom attribute transform, to specify custom mappings for multiple attributes.
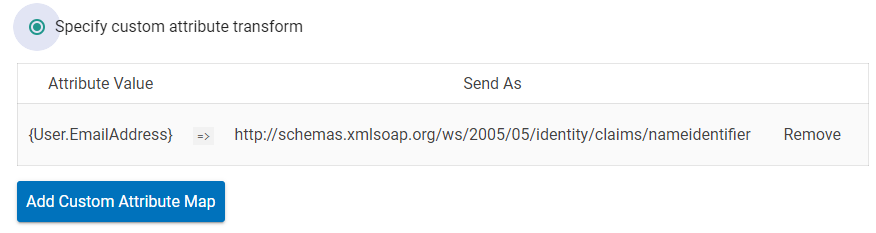
- Select Add Custom Attribute Map.

- Select attribute value and issue as type.

- Select Add Mapping.
- Select Save Changes.
Configure Service Now
You will need to follow this guide posted Service Now: