Sections:
Adding NAS CIFS or NFS Target
Perform Import to Source
Perform Restores
Add NAS CIFS or NFS target
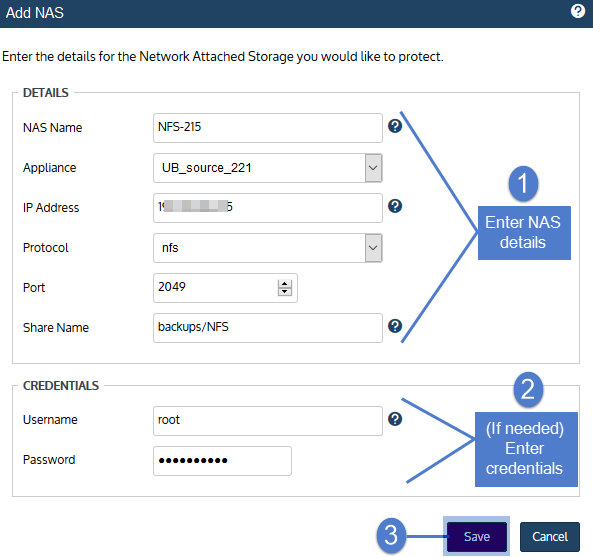
- Select Configure > Protected Assets.
- Click Add > NAS.
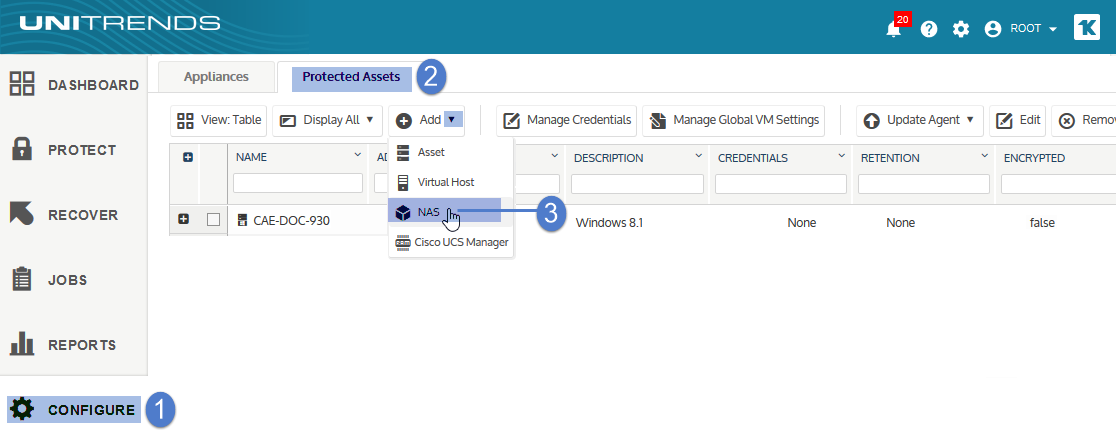
- Enter the NAS Name. The name cannot contain spaces.
- Select the Appliance that will protect this asset.
- Enter the NAS IP address or resolvable hostname.
- Select the CIFS or NFS protocol.
- The Port field contains the default for the protocol selected. If the protocol uses a custom port, enter that port number.
- Enter the full directory pathname of the NAS share in the Share Name field. Do not use leading or ending slashes.
- Example pathname: parentShare/subDirectory1/subDirectory2.
- To protect only the subDirectory2 share and its subdirectories, enter parentShare/subDirectory1/subDirectory2.
- To protect parentShare and all of its subdirectories, enter parentShare.
- If credentials are required to access the share and these credentials enable access to a parent directory only, enter the full path to the parent directory. You can specify desired folders and files to include in the backup when you create the job.
- If credentials are required to access the NAS share, enter the Username and Password.
Note: For the CIFS protocol, the password must not contain spaces. (Spaces can be used in passwords for the NFS protocol only.) - Click Save.

Perform Import to Source
From the source appliance, you can recover hot backup copies that reside in the Unitrends Cloud or that reside on a target appliance. The recovery procedures either import the backup copy to the source appliance or recover files directly from the backup copy on the target.
To recover an entire backup copy, you must first import the backup copy to the source backup appliance. Once the backup copy has been imported, recover from the imported backup copy by using the Recover from backups or imported backup copies procedures.
For details on importing a backup copy, see To import a hot backup copy.
Perform File restores
To recover files from backup copies that reside in the Unitrends Cloud or reside on a target appliance, run these procedures from the source backup appliance:
To select files and folders from a VM host level backup copy
Perform Restore of whole import to NAS
To select files and folders from a backup copy by using the File Browser
Note: The file browser contains the backup copy you select plus all dependent data in the backup group. For example, selecting an incremental enables you to browse the incremental plus its parent full and any other dependent incrementals in the chain. (For details, see Backup groups.)
- Log in to the source backup appliance.
- Select Recover and click the Backup Catalog tab.
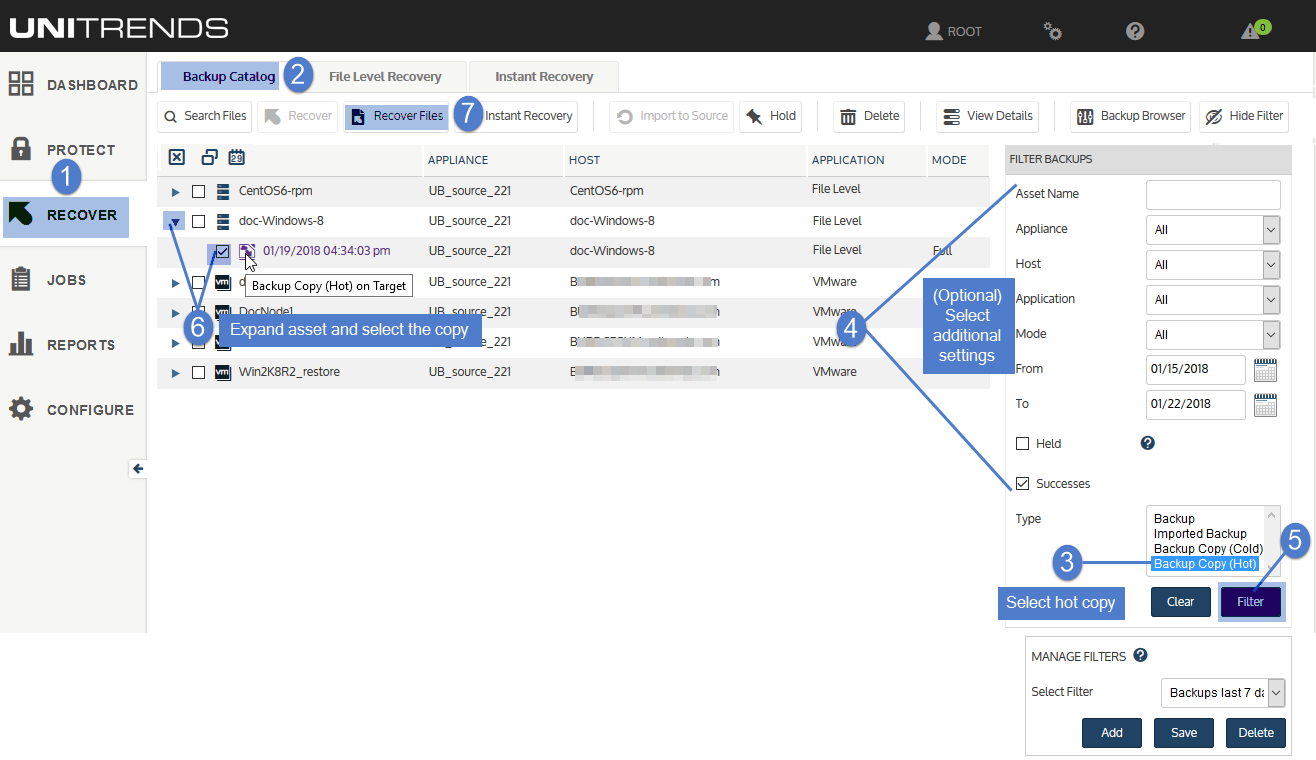
- Use Filter Backups to the right to display hot backup copies: In the Type box, select Backup Copy (Hot). Select other filter options as desired. For details, see Working with custom filters. Click Filter. Expand the asset and select a Backup Copy (Hot) on Target to use for the recovery.
-
To be certain you are viewing a backup copy that resides on the target appliance or in the Unitrends Cloud, hover over the backup copy icon and verify the description that displays is Backup Copy (Hot) on Target.
-
-
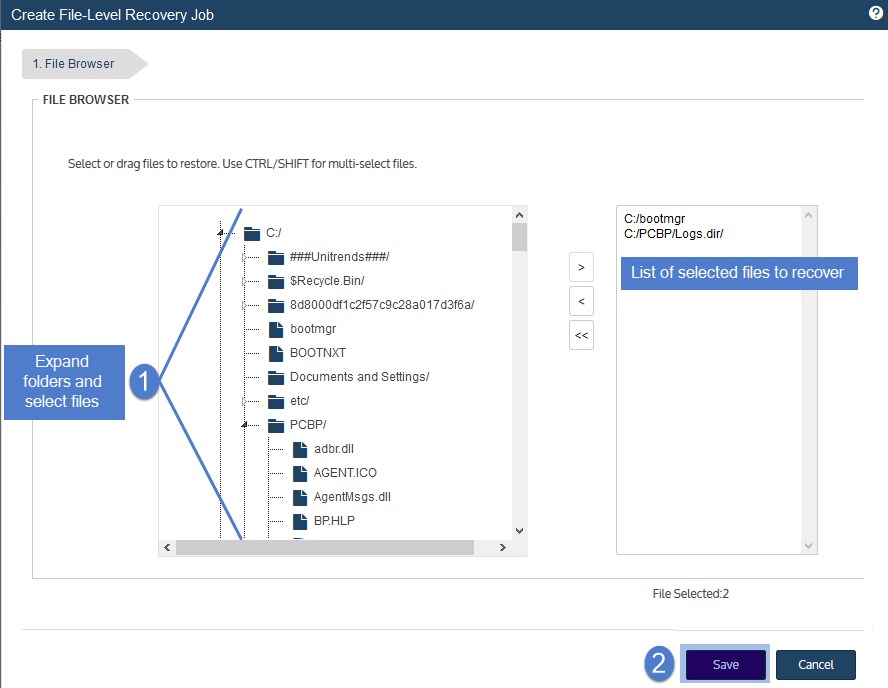
In the File Browser, expand folders to view items in the backup copy.
-
Note: Softlinks (also called symbolic links) are excluded from download. If you select a directory that contains files and softlinks, only the files are downloaded.
-
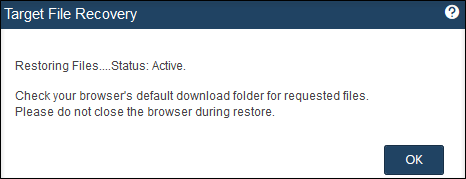
The message Starting File Level Recovery on the Target displays, indicating that the recovery has started. To verify that the download starts, leave the message dialog open and view the status messages. Job status changes from Queued to Active to Downloading.
-
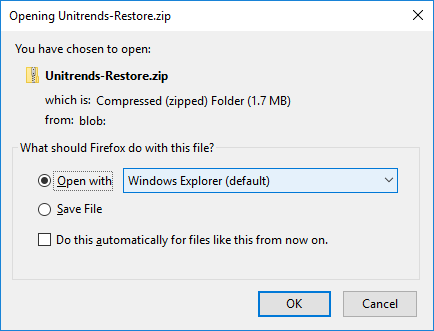
A .zip file containing the recovered files is placed in the default download location of the browser where the source appliance UI is running. When the download completes, the Unitrends-Restore.zip file displays in the browser. Open the .zip file to access the recovered files.
The duration of the download is impacted by various factors, such as the size of the files, bandwidth, and download speed. Persistent browser and UI sessions are required to create the .zip file in the browser's default download location. If you close the browser or UI session during the recovery, you must run a new job.

Perform Restore of whole import to NAS
Once the backup is completed importing follow the below to restore from the imported backup to the NAS
- Log in to the source backup appliance.
- Select Recover and click the Backup Catalog tab.
- Use Filter Backups to the right to display hot backup copies:
- In the Type box, select Imported Backup.
- Select other filter options as desired based on From/To values
- Click Filter.
- Expand the asset and select a backup to use for the recovery.
- Click Recover Files
- From "Create File-Level Recovery Job" dialog choose the files/volumes to restore to the NAS
- On the Recovery Options tab:
- Asset: Cloud_Archive-NAS-RRC
- Directory: Path to restore files too
